Coleus plants, known for their vibrant foliage and ease of care, are popular choices for both indoor and outdoor gardening. One of the best ways to propagate coleus is through cuttings. This method not only allows you to multiply your favorite varieties but also ensures that you retain the specific characteristics of the parent plant. In this article, we will explore the best practices for growing coleus from cuttings indoors, ensuring that you achieve success with minimal effort.
Understanding Coleus
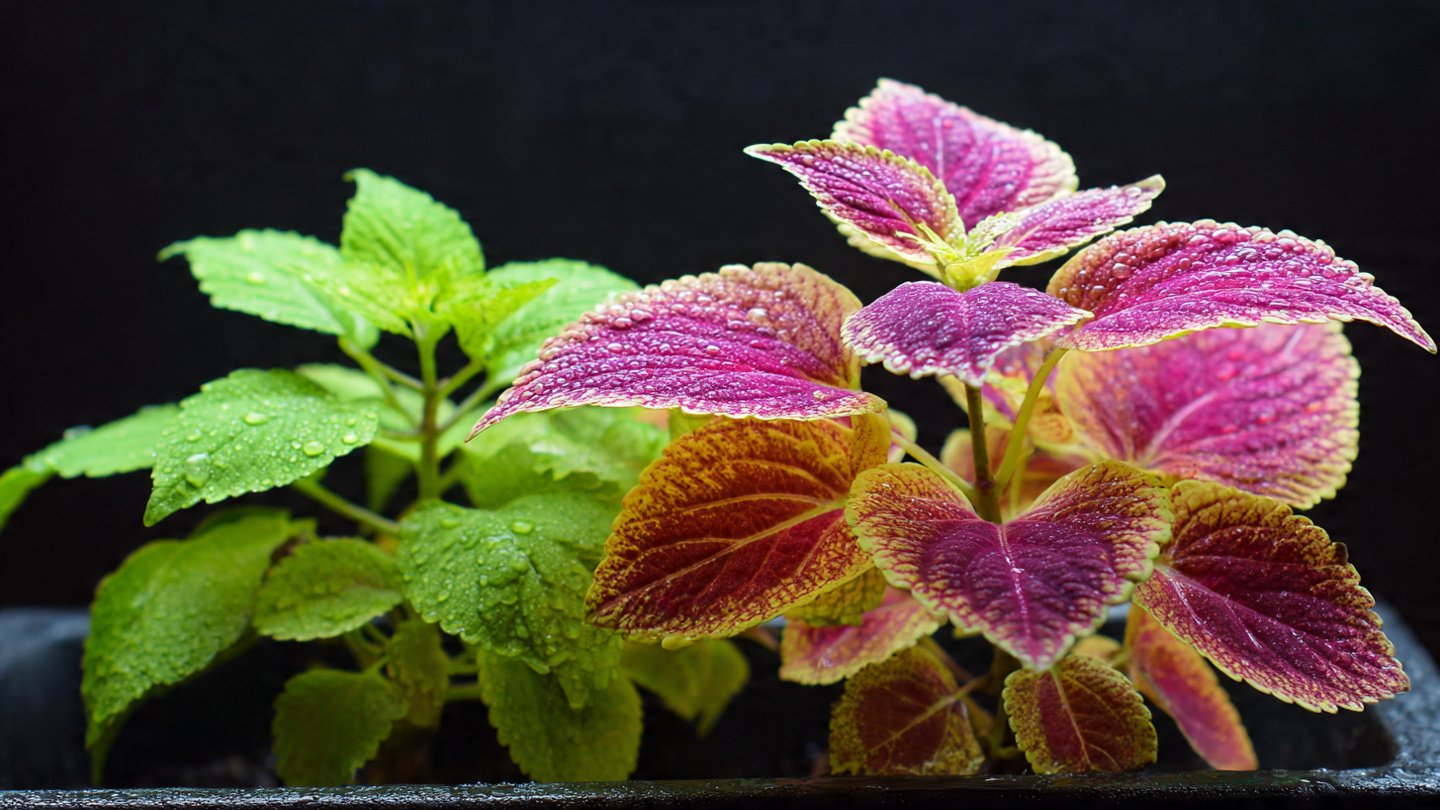
Coleus (Solenostemon scutellarioides) is a tropical perennial plant known for its stunning leaves, which come in various shades from deep burgundy to bright yellow-green. Though typically grown as an annual in many regions, coleus can thrive year-round in warm climates or indoors. Its versatility and ease of care make it a favorite among houseplant enthusiasts.
Latest Posts
- OnePlus 15T Smartphone Unveiled – Featuring 200MP Camera, Snapdragon 8 Elite Gen 5 and Massive Battery
- Lava Yuva 5G Unveiled – 120Hz Display and Strong Performance for Everyday Use
- Nokia 1100 Launched – Premium Keypad Phone Returns at Budget Price ₹2,500
- Motorola G96 5G Unveiled – Featuring Stylish Design, Strong Performance and Advanced Camera Tech
- Vivo Y21d Unveiled – Massive 6000mAh Battery for All-Day Everyday Use
- Nothing Phone 4 Ultra 5G Launched – 16GB RAM, AI-Powered 50MP Camera and Flagship Performance
- OnePlus 5G Smartphone Launched – 300MP AI Camera, 7000mAh Battery & 100W Fast Charging
- Nothing Phone 3a Pro – High processor smartphone for gaming lovers – battery is 5000mAH
- Realme 15 Pro – 3 days battery backup smartphone with 50MP front camera under ₹28,000
- Vivo X200 FE – 12GB RAM + 256GB Storage smartphone with HD quality camera
Why Propagate Coleus from Cuttings?
1. Retain Parent Traits
When you propagate coleus through cuttings, you create clones of the parent plant, ensuring that the new plants will have the same color and leaf patterns.
2. Cost-Effective
Creating new plants through cuttings is far more economical than purchasing new plants.
3. Active Engagement
Taking cuttings and watching them grow nurtures a deeper connection with your plants and enhances your gardening skills.
When to Take Cuttings
The best time to take coleus cuttings is during the growing season, typically spring or early summer. During this period, the plant is most active, and the chances of successful rooting are higher.
Tools You’ll Need
Before you begin, gather the following tools:
- Sharp, Clean Scissors or Pruners: To prevent disease transmission, ensure your cutting tool is sterilized.
- Potting Soil: A lightweight, well-draining mixture is ideal.
- Small Pots or Containers: For planting the cuttings.
- Water: For misting and soaking cuttings.
- Plastic Bag or Humidity Dome: To create a humid environment.
- Rooting Hormone (Optional): While not essential, it can encourage faster root development.
Steps to Grow Coleus from Cuttings Indoors
Step 1: Select the Parent Plant
Choose a healthy coleus plant that shows no signs of disease or pest infestation. Look for a mature plant with vibrant leaves and a well-established root system. Ideally, select a plant that has multiple stems, allowing you to take several cuttings without harming the parent.
Step 2: Take Cuttings
-
Cut Length: Use sharp scissors to cut a healthy stem section that is about 4 to 6 inches long. Ensure the cutting has at least one or two leaf nodes (the points where leaves attach to the stem).
-
Remove Lower Leaves: Strip off the lower leaves of the cutting, leaving two or three sets of leaves at the top. This reduces moisture loss and encourages root development.
Step 3: Optional Use of Rooting Hormone
Dip the cut end of the coleus cutting into rooting hormone, tapping off any excess. While this step is not mandatory, rooting hormone can enhance root formation and speed up the process.
Step 4: Prepare the Potting Medium
-
Choose a Container: Select small pots or containers with drainage holes to prevent waterlogging.
-
Fill with Soil: Use a lightweight, well-draining potting mix. You can create your own mix by combining equal parts of peat moss, perlite, and vermiculite.
Step 5: Plant the Cuttings
-
Insert Cuttings: Make a small hole in the soil with your finger or a pencil. Place the cut end of the cutting into the hole, burying it about an inch deep. Firm the soil gently around the base to support the cutting.
-
Watering: Lightly water the soil after planting to ensure it is moist but not soggy.
Step 6: Create a Humid Environment
To encourage root development, create a humid environment around the cuttings:
-
Plastic Bag Method: Place a clear plastic bag over the pot, ensuring it does not touch the leaves. This will trap moisture and create humidity.
-
Humidity Dome: Alternatively, use a humidity dome if you have one available.
Step 7: Provide Proper Lighting
-
Place the cuttings in an area with bright, indirect sunlight. Avoid direct sunlight, as it can scorch the leaves and hinder root development.
-
If lighting is limited, consider using a grow light positioned a few inches above the cuttings.
Step 8: Monitor Moisture Levels
Keep the potting medium consistently moist but not saturated. Check the soil every few days and water as necessary. Simultaneously, check under the plastic bag or dome for condensation; if too much moisture accumulates, remove it for a short period to allow for ventilation.
Step 9: Root Development
In about two to four weeks, you should start to see root development. Signs include growth of new leaves, a firm feeling in the cutting, and the inability to gently pull the cutting out of the soil.
Step 10: Transplanting
Once the cuttings have a robust root system and exhibit new growth, it’s time to transplant them into larger pots or into your desired outdoor location if conditions allow.
-
Choose a Larger Container: If transplanting, select a pot that is larger than the current one, ensuring it has drainage holes.
-
Use Fresh Potting Mix: Fill the new container with a suitable potting mix, as mentioned earlier.
-
Transplanting Process: Carefully remove the cuttings from their original pots, ensuring you don’t damage the roots. Place them in the new pot, fill with soil, and water lightly.
Step 11: Continued Care
After transplanting, continue to care for your coleus plants:
- Light: Ensure they receive bright, indirect sunlight.
- Watering: Keep the soil consistently moist but never soggy.
- Fertilization: Feed with a balanced liquid fertilizer every 4-6 weeks once they are established.
Troubleshooting Common Issues
1. Wilting Leaves
If your cuttings are wilting, they may be getting too much direct sunlight or not enough humidity. Adjust the light source and ensure humidity is maintained.
2. Root Rot
If you notice yellowing leaves or the cuttings appear mushy, root rot may be the issue. Ensure that the potting medium drains well and allow it to dry out slightly between waterings.
3. Slow Growth
If your cuttings are growing slowly, they may require more light or may not be rooted adequately. Ensure they are in a bright spot and check for root development.
Conclusion
Growing coleus from cuttings indoors is a rewarding and straightforward method to expand your plant collection. With the right techniques, you can achieve success and enjoy the vibrant colors and textures that coleus plants bring to your home. By following the steps outlined in this guide, you will not only propagate beautiful plants but also deepen your understanding and appreciation of gardening. Happy planting!