Microgreens are tiny, nutrient-packed seedlings that add flavor, texture, and color to a variety of dishes. They’re easy to grow, require minimal space, and can be cultivated indoors all year round. If you’re a beginner looking to embark on the rewarding journey of growing your own microgreens, this comprehensive guide will walk you through the process step-by-step.
What are Microgreens?
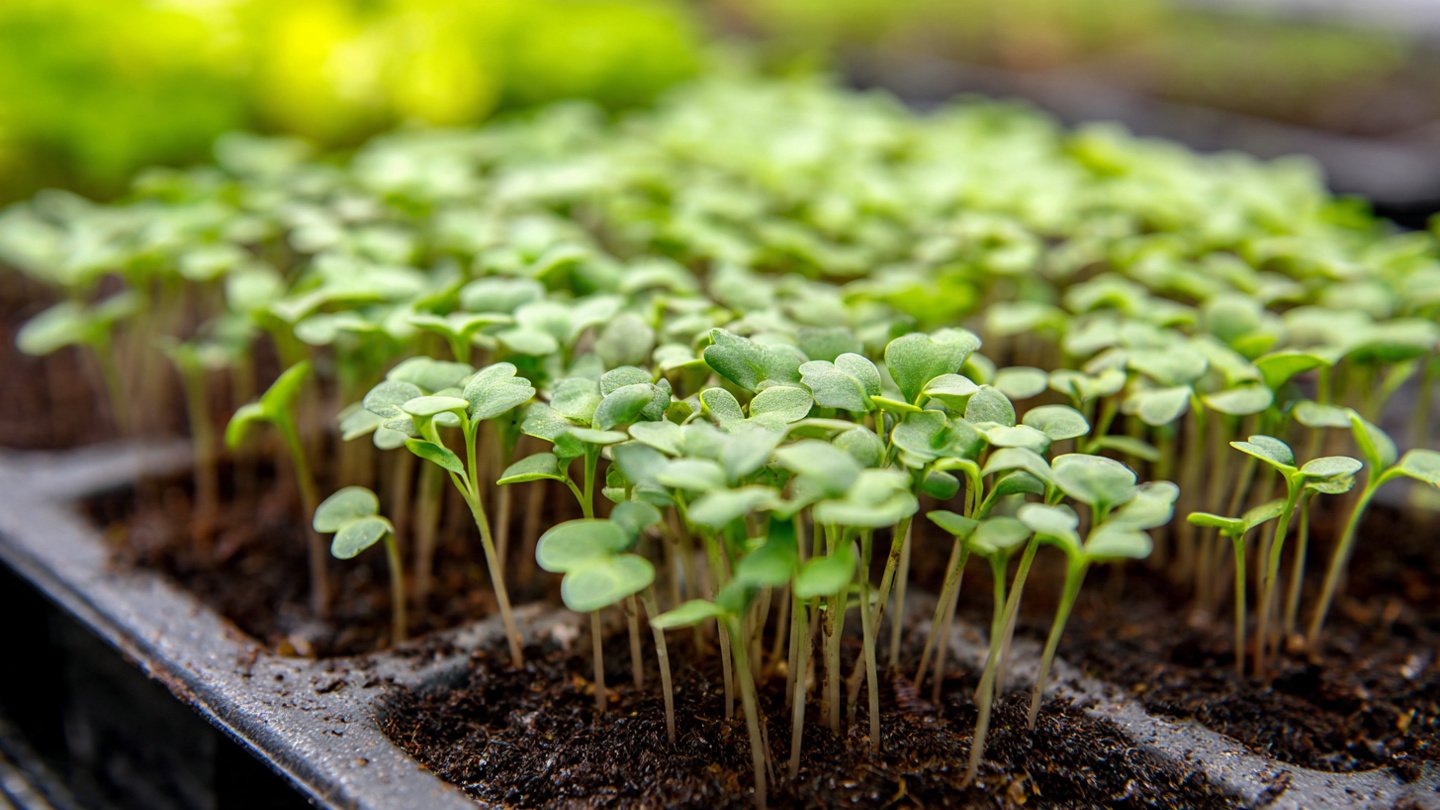
Microgreens are the young seedlings of various edible vegetables and herbs. Typically harvested one to three weeks after germination, they are used in salads, sandwiches, and as garnishes. Common types include:
Latest Posts
- OnePlus 15T Smartphone Unveiled – Featuring 200MP Camera, Snapdragon 8 Elite Gen 5 and Massive Battery
- Lava Yuva 5G Unveiled – 120Hz Display and Strong Performance for Everyday Use
- Nokia 1100 Launched – Premium Keypad Phone Returns at Budget Price ₹2,500
- Motorola G96 5G Unveiled – Featuring Stylish Design, Strong Performance and Advanced Camera Tech
- Vivo Y21d Unveiled – Massive 6000mAh Battery for All-Day Everyday Use
- Nothing Phone 4 Ultra 5G Launched – 16GB RAM, AI-Powered 50MP Camera and Flagship Performance
- OnePlus 5G Smartphone Launched – 300MP AI Camera, 7000mAh Battery & 100W Fast Charging
- Nothing Phone 3a Pro – High processor smartphone for gaming lovers – battery is 5000mAH
- Realme 15 Pro – 3 days battery backup smartphone with 50MP front camera under ₹28,000
- Vivo X200 FE – 12GB RAM + 256GB Storage smartphone with HD quality camera
- Broccoli
- Radish
- Pea Shoots
- Basil
- Cilantro
These miniature greens pack a powerful nutritional punch, containing higher concentrations of vitamins and minerals than their mature counterparts. With their explosive flavors and vibrant colors, microgreens can elevate any dish while offering substantial health benefits.
Why Grow Microgreens Indoors?
- Space-saving: Microgreens require very little space, making them perfect for apartments or homes without gardens.
- Year-round cultivation: Indoor growing means you can produce microgreens any time of the year without worrying about external weather conditions.
- Quick harvest: Most microgreens reach harvestable size in 7 to 21 days, allowing for rapid turnover.
- Cost-effective: Growing your own saves money, especially since microgreens can be expensive in stores.
What You’ll Need
Materials
-
Containers: Shallow trays with drainage holes are ideal. You can use seedling flats, recycled containers, or even decorative boxes.
-
Growing Medium: High-quality potting soil, coconut coir, or a soil-less mix will work. Choose one that is lightweight and well-draining.
-
Seeds: Purchase seeds specifically labeled for microgreens. Look for organic options or those from reputable suppliers.
-
Light Source: If natural sunlight isn’t available, consider using grow lights. LED grow lights mimic sunlight and promote healthy growth.
-
Watering Can or Spray Bottle: For gentle watering.
-
Plastic Cover (Optional): A dome lid or plastic wrap can help retain moisture during germination.
Optional Supplies
- pH Test Kit: To test soil acidity (not mandatory but helpful).
- Tweezers: For precise handling of tiny seeds.
- Labels: To keep track of different varieties.
Step-by-Step Growing Process
Step 1: Choose Your Seeds
While you can grow various vegetables and herbs as microgreens, select those that suit your taste and culinary needs. Popular choices for beginners include:
- Sunflower: Rich in healthy fats and protein
- Peas: Sweet flavor and tender texture
- Radish: Spicy and crisp
- Basil: Aromatic and versatile in cooking
Be sure to source high-quality, non-GMO seeds specifically labeled for microgreens, as some seeds may be treated with chemicals unsuitable for edible crops.
Step 2: Prepare the Growing Medium
-
Fill the Tray: Add your chosen growing medium to the container, filling it about 1-2 inches deep.
-
Moisten the Soil: Before planting, lightly moisten the growing medium. You want it damp but not soggy. A spray bottle works well for this task.
-
Level the Surface: Ensure the growing medium is level for uniform seed germination.
Step 3: Sow the Seeds
-
Seed Density: Scatter seeds evenly across the surface of the growing medium. Aim for a density that allows air circulation and avoids overcrowding.
-
Lightly Press: Gently press the seeds into the soil, ensuring good contact but not burying them too deep.
-
Cover (Optional): If using a plastic cover, place it over the tray to help retain moisture during germination.
Step 4: Water the Seeds
Using a spray bottle or a watering can with a fine nozzle, lightly mist the surface of the seeds. Be careful not to wash away the seeds or disturb their placement. Keep the soil consistently moist throughout the germination phase.
Step 5: Provide Proper Lighting
Microgreens need around 12-16 hours of light per day for optimal growth. If you have access to natural sunlight, place your tray near a south-facing window. If not, consider investing in LED grow lights.
-
Light Schedule: Establish a regular light schedule, allowing the lights to remain on for the recommended duration.
-
Distance: Position lights about 6-12 inches above the microgreens to ensure they receive adequate light without burning.
Step 6: Care During Growth
-
Monitor Moisture: Check the growing medium regularly and mist with water as needed to maintain moisture levels.
-
Thin if Necessary: If seedlings are overcrowded, thin them out gently by snipping excess greens with scissors.
-
Maintain Temperatures: Microgreens prefer temperatures between 60°F to 75°F (15°C to 24°C). Adjust positioning or heating to achieve ideal conditions.
Step 7: Harvesting
Once the microgreens have reached about 1-3 inches in height and have developed their first true leaves (cotyledons), they are ready for harvest.
-
Use Scissors: Cut the greens just above the soil line with clean kitchen scissors.
-
Rinse and Store: Rinse them under cool water and dry before storage. Store in a sealed container in the refrigerator to maintain freshness.
Step 8: Enjoy!
Now that you have harvested your microgreens, add them to salads, sandwiches, smoothies, and more. Enjoy the burst of flavor and nutrition they bring to your meals!
Troubleshooting Common Issues
-
Leggy Growth: If your microgreens are tall and spindly, it may be due to insufficient light. Adjust your light source or increase the light duration.
-
Mold Growth: Excess moisture is often the culprit. Ensure proper air circulation and avoid over-watering.
-
Slow Germination: Temperature may be too low, or seeds may not have adequate moisture.
-
Bitter Flavor: If microgreens taste bitter, they might be overcooked or too old. Aim to harvest them at the right time, generally within 10-21 days of sowing.
Conclusion
Growing microgreens indoors is a simple and rewarding way to enhance your cooking while reaping numerous health benefits. With only a few materials and following these straightforward steps, you can cultivate a diverse range of greens to enjoy year-round. Start your microgreens journey today and transform your culinary experience with fresh, home-grown flavors. Happy planting!