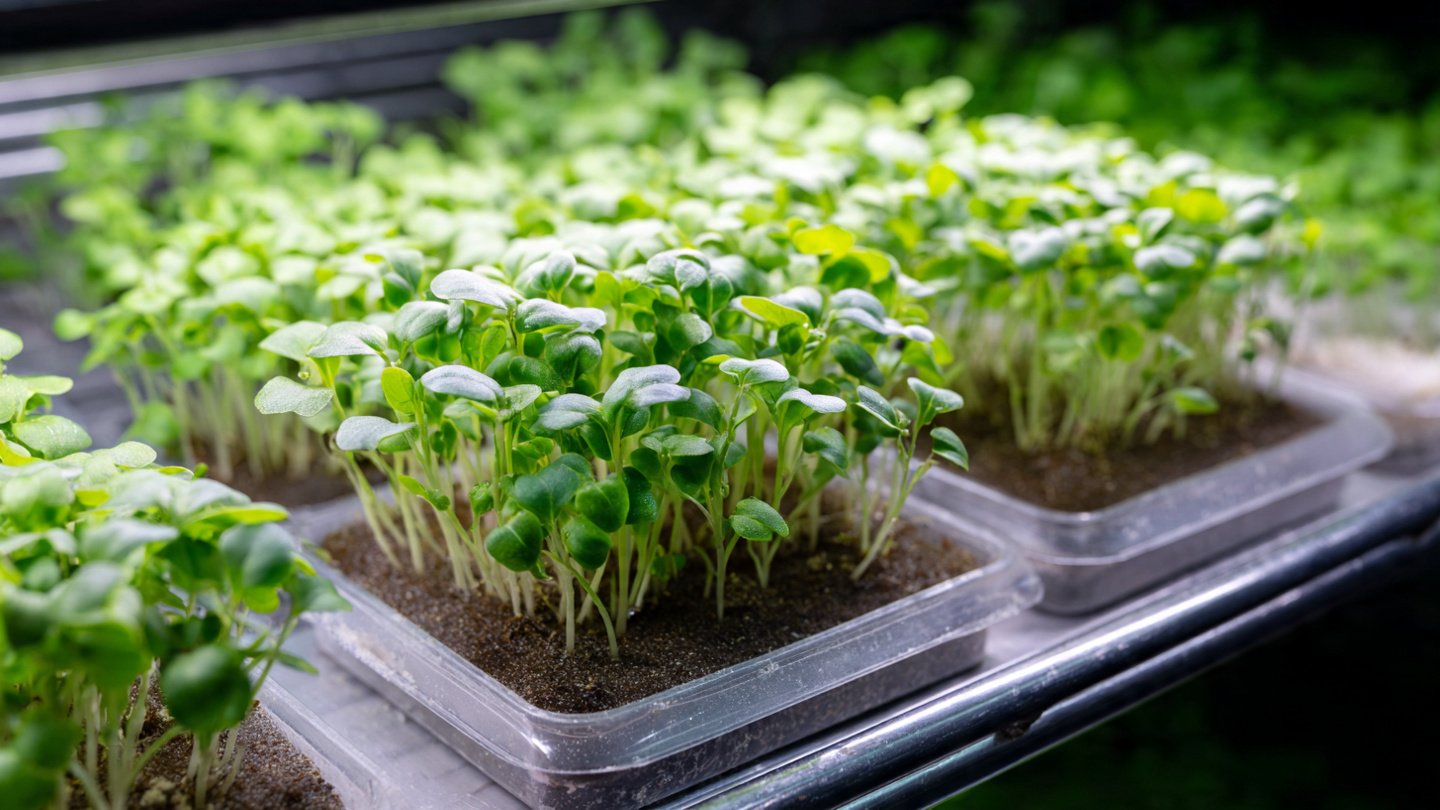
Microgreens have taken the culinary world by storm, praised for their vibrant flavors, intense nutrition, and ease of growth. These miniature greens, harvested just after the first true leaves appear, are packed with vitamins and minerals. They can be grown in various mediums, but for those looking for a cleaner, soil-free method, hydroponics is the way to go. This article will guide you through the simple steps to grow microgreens without soil, sharing ultimate hacks to make the process even easier.
Why Grow Microgreens?
Nutritional Benefits
Latest Posts
- OnePlus 15T Smartphone Unveiled – Featuring 200MP Camera, Snapdragon 8 Elite Gen 5 and Massive Battery
- Lava Yuva 5G Unveiled – 120Hz Display and Strong Performance for Everyday Use
- Nokia 1100 Launched – Premium Keypad Phone Returns at Budget Price ₹2,500
- Motorola G96 5G Unveiled – Featuring Stylish Design, Strong Performance and Advanced Camera Tech
- Vivo Y21d Unveiled – Massive 6000mAh Battery for All-Day Everyday Use
- Nothing Phone 4 Ultra 5G Launched – 16GB RAM, AI-Powered 50MP Camera and Flagship Performance
- OnePlus 5G Smartphone Launched – 300MP AI Camera, 7000mAh Battery & 100W Fast Charging
- Nothing Phone 3a Pro – High processor smartphone for gaming lovers – battery is 5000mAH
- Realme 15 Pro – 3 days battery backup smartphone with 50MP front camera under ₹28,000
- Vivo X200 FE – 12GB RAM + 256GB Storage smartphone with HD quality camera
Microgreens are nutrient-dense, often containing higher levels of vitamins and minerals than their mature counterparts. They are rich in antioxidants, making them an excellent addition to any diet.
Versatility
From sweet basil to spicy radish, microgreens can be used in salads, sandwiches, soups, and garnishes, adding flavor and color to dishes.
Quick Turnaround
Microgreens can be harvested in as little as 7 to 21 days, depending on the variety, making them a fast-growing crop that provides immediate gratification.
Minimal Space Required
Growing microgreens requires very little space, making them ideal for urban dwellers or anyone with limited gardening space.
The Hydroponic Method Explained
Hydroponics involves growing plants without soil, using nutrient-rich water instead. This method offers several advantages:
- Faster Growth: Without the restrictions of soil, nutrients are readily available to the plants.
- Less Mess: Growing without soil means cleaner, happier surroundings.
- Reduced Pests and Diseases: Soil-free systems are generally less susceptible to common soil-born pests and diseases.
Types of Hydroponic Systems
-
Nutrient Film Technique (NFT): A thin film of nutrient solution is continuously circulated over the roots of plants. This is effective but requires a bit more setup.
-
Deep Water Culture (DWC): Plants are suspended in a nutrient solution with their roots submerged. This is simpler to set up and maintain, making it ideal for beginners.
-
Aeroponics: Roots are suspended in air and misted with nutrient solution. This technique promotes rapid growth but can be more complex.
For our purposes, a simple DWC system will be the focus, perfect for beginners eager to start their microgreens journey.
Step-by-Step Guide to Growing Microgreens Without Soil
Step 1: Gather Materials
Essential Supplies
- Containers: You can use plastic trays, containers, or net pots.
- Growing Medium: While you won’t use soil, you do need something to support the seeds. Options include coconut coir, peat pellets, or even paper towels.
- Nutrient Solution: Purchase a balanced hydroponic nutrient solution specifically formulated for seedlings.
- Water: Use filtered or distilled water to avoid chlorine or other chemicals found in tap water.
Step 2: Choose Your Seeds
Almost any microgreen seed can be grown hydroponically. Some popular options include:
- Radish: Fast-growing and offers a peppery taste.
- Pea Shoots: Sweet and tender, perfect for salads.
- Sunflower: Nutty flavor and a hearty texture.
- Basil: Aromatic and great in many dishes.
When selecting seeds, ensure they are suitable for hydroponic growth. Organic seeds are always a good choice, as they are free from pesticides.
Step 3: Prepare Your Growing Medium
Using your chosen medium (like coconut coir or paper towels), place it in the bottom of your containers. Soak the medium in water so it’s moist but not overly saturated. This will provide the seeds with the moisture they need to germinate.
Step 4: Plant the Seeds
Distribute the seeds evenly over the moist growing medium. You can sprinkle them liberally but avoid overcrowding; the microgreens need space to grow.
Step 5: Mist and Cover
After planting, lightly mist the seeds with water to ensure they are adequately moist. Cover the containers with a lid, plastic wrap, or a damp paper towel to create a humid environment, which is essential for germination.
Step 6: Light and Temperature
Place the containers in a warm, well-lit area. Microgreens need plenty of light to thrive. If possible, use grow lights if natural sunlight is insufficient. Aim for 14-16 hours of light per day for optimal growth.
Step 7: Watering and Nutrient Mix
After germination, typically 2-7 days depending on the variety, remove the cover. Ensure the medium remains moist but not waterlogged.
By the time your seedlings start to develop their first true leaves, it’s time to introduce the nutrient solution. Dilute the hydroponic nutrient solution according to the manufacturer’s instructions and water the microgreens lightly.
Step 8: Harvesting
Depending on the microgreen type, they should be ready to harvest in 7-21 days. Look for microscopic leaves and vibrant colors as tell-tale signs of readiness. Use clean scissors to cut the microgreens just above the growing medium.
Step 9: Use and Enjoy
Your fresh microgreens are now ready to be enjoyed! Add them to salads, sandwiches, or as garnishes for your favorite dishes. Don’t forget to share your success with friends and family!
Tips and Tricks for Success
-
Experiment with Varieties: Try growing different seeds to discover your favorites.
-
Rotate Crops: Start new crops every week to maintain a steady supply of microgreens.
-
Monitor Light: If your microgreens are leggy or stretching towards the light, they need more direct light.
-
Check for Mold: If you notice mold growing on your medium, improve airflow around the plants and trim back humidity.
-
Stay Clean: Ensure all tools and containers are clean before use to prevent contamination.
Troubleshooting Common Issues
-
Wilting: This could be a sign of underwatering or overwatering. Adjust your watering schedule accordingly.
-
Yellowing Leaves: Often a sign of nutrient deficiency. Double-check that you’re using the right nutrient mix and watering properly.
-
Slow Growth: Insufficient light or nutrients can impede growth. Ensure you are providing adequate light (14-16 hours) and nutrients.
-
Pests: Although hydroponic systems are generally less susceptible, keep an eye out for aphids or other pests. A gentle soap spray can help control these.
The Benefits of a Hydroponic System
Beyond just growing microgreens without soil, hydroponics offers various advantages:
- Water Efficiency: Hydroponic systems use less water compared to soil gardening, making them more sustainable.
- Urban Farming: Perfect for city dwellers, hydroponics can be done indoors or in small spaces.
- Pesticide-Free: The controlled environment minimizes the need for pesticides.
Final Thoughts
Growing microgreens without soil is not only easy but also a rewarding experience. Whether you are looking for a new hobby, a source of fresh greens, or an educational project for children, this method of gardening suits all. With just a few materials and basic knowledge, you can enjoy nutritious, vibrant microgreens year-round.
So gather your equipment, choose your seeds, and embark on the journey of growing microgreens without the mess of soil. Enjoy the satisfaction that comes from cultivating your own edible greens in the comfort of your home!
Additional Resources
For those eager to delve deeper into hydroponics or microgreen cultivation, consider online forums, local gardening clubs, or workshops that specialize in urban farming techniques. Engaging with a community can provide tips, motivation, and a wealth of shared knowledge to enhance your gardening journey.