Zinnias are beloved for their bright colors, ease of care, and ability to attract butterflies. While traditionally grown outdoors, mini zinnias make a delightful indoor plant option. This step-by-step guide will walk you through the process of growing mini zinnias indoors, ensuring you enjoy a vibrant display of blooms right in your home.
Why Choose Mini Zinnias?
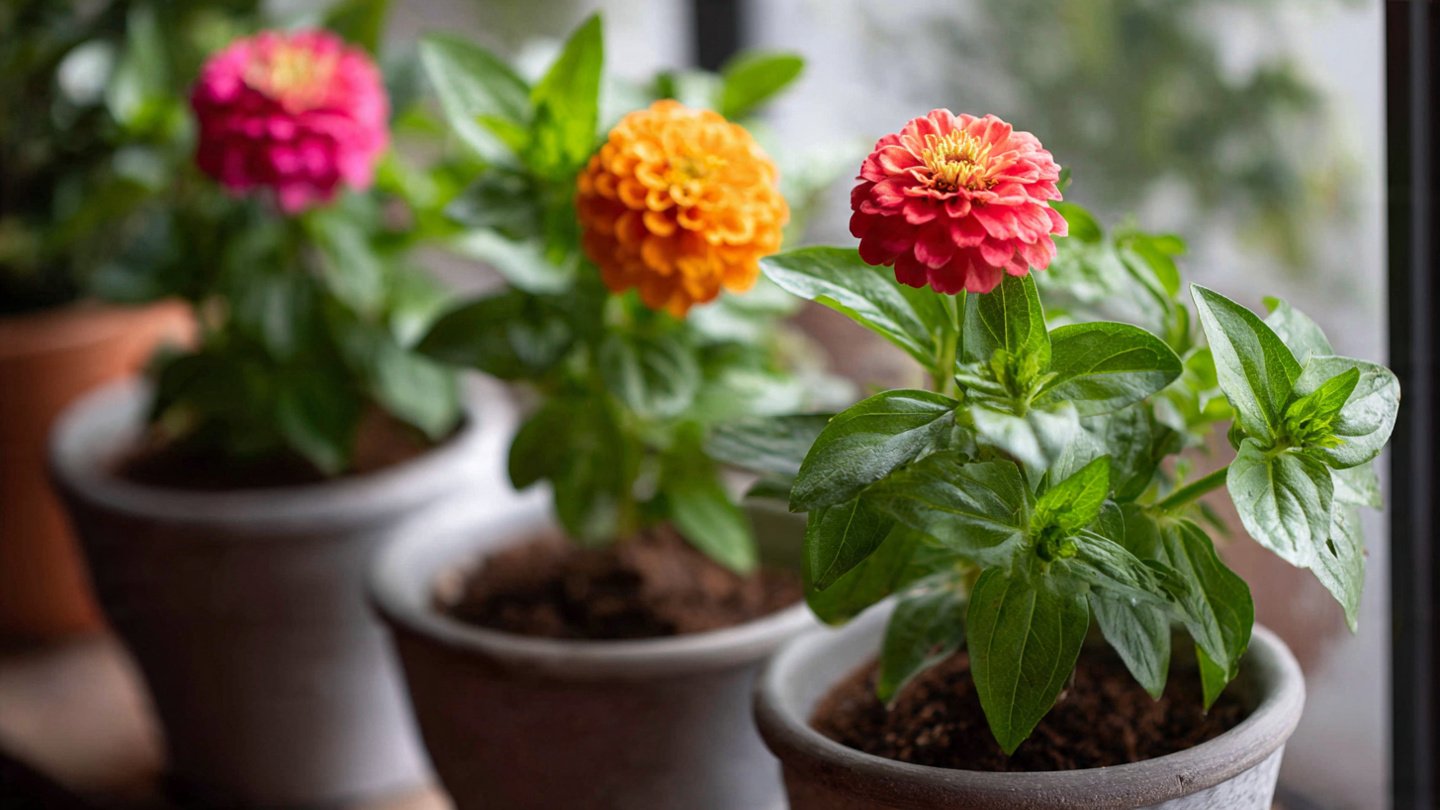
Mini zinnias (Zinnia elegans) are compact, quick-growing flowers that vary in color, size, and shape. Their diminutive size makes them perfect for pots on windowsills or desktops. They thrive indoors as long as their basic needs—light, water, and nutrients—are met.
Latest Posts
- OnePlus 15T Smartphone Unveiled – Featuring 200MP Camera, Snapdragon 8 Elite Gen 5 and Massive Battery
- Lava Yuva 5G Unveiled – 120Hz Display and Strong Performance for Everyday Use
- Nokia 1100 Launched – Premium Keypad Phone Returns at Budget Price ₹2,500
- Motorola G96 5G Unveiled – Featuring Stylish Design, Strong Performance and Advanced Camera Tech
- Vivo Y21d Unveiled – Massive 6000mAh Battery for All-Day Everyday Use
- Nothing Phone 4 Ultra 5G Launched – 16GB RAM, AI-Powered 50MP Camera and Flagship Performance
- OnePlus 5G Smartphone Launched – 300MP AI Camera, 7000mAh Battery & 100W Fast Charging
- Nothing Phone 3a Pro – High processor smartphone for gaming lovers – battery is 5000mAH
- Realme 15 Pro – 3 days battery backup smartphone with 50MP front camera under ₹28,000
- Vivo X200 FE – 12GB RAM + 256GB Storage smartphone with HD quality camera
Benefits of Growing Mini Zinnias Indoors
- Colorful Decor: Mini zinnias add a splash of color to any indoor space, brightening up drab corners or spaces.
- Low Maintenance: These flowers are relatively easy to grow, making them perfect for beginners or those with limited gardening experience.
- Air Purification: Plants, including zinnias, can help purify indoor air.
- Butterfly Attraction: Growing zinnias indoors can attract butterflies and beneficial insects, creating a mini ecosystem.
What You’ll Need
Before you start planting, gather the following supplies:
- Seeds: Choose a quality packet of mini zinnia seeds. Popular varieties include ‘Zahara’, ‘Profusion’, and ‘Cut and Come Again’.
- Containers: Select pots with drainage holes (4-6 inches deep is ideal).
- Potting Soil: Use a well-draining potting mix that retains some moisture.
- Watering Can/Sprayer: To water your plants effectively.
- Fertilizer: A balanced, water-soluble fertilizer with equal parts nitrogen, phosphorus, and potassium (NPK).
- Light Source: Ideally, grow lights if natural light is limited.
Step-by-Step Guide to Growing Mini Zinnias Indoors
Step 1: Choose the Right Container
The first step in growing mini zinnias is selecting an appropriate container. Make sure the pots have at least one drainage hole to prevent water from logging at the bottom, which can lead to root rot. Clay pots are a particularly good choice because they help absorb moisture.
Step 2: Prepare the Soil
Fill the container with a high-quality potting mix, leaving about an inch of space at the top. This soil should be well-draining to keep moisture levels balanced. You might also consider mixing in some perlite or sand to improve drainage further.
Step 3: Plant the Seeds
Sow the mini zinnia seeds about 1/4 inch deep in the soil. You can plant 2-3 seeds in each pot for a fuller appearance. Gently cover the seeds with soil and lightly tamp it down to ensure good seed-to-soil contact.
Step 4: Water Your Seeds
After planting, water the soil gently using a watering can or spray bottle to avoid displacing the seeds. The soil should be moist but not soggy. Overwatering can lead to damping-off disease, which is a common issue for seedlings.
Step 5: Provide Adequate Lighting
Mini zinnias thrive in full sunlight—ideally, they need at least 6 hours of direct sunlight per day. If natural light is limited, consider using grow lights. Position the lights about 6-12 inches above the seedlings and adjust the height as they grow. A timer can also help regulate lighting periods.
Step 6: Maintain Humidity and Temperature
Zinnias prefer warm conditions. The ideal temperature range for growth is between 70-75°F (21-24°C). If you live in a particularly dry climate, mist the plants lightly, or place a small humidifier nearby to maintain humidity levels.
Step 7: Thin Your Seedlings
Once your seedlings reach about 2 inches tall and have developed at least two true leaves, it’s time to thin them. Choose the strongest seedling in each pot while removing the weaker ones. This process helps prevent overcrowding and allows the selected plant to grow stronger and healthier.
Step 8: Fertilize
Mini zinnias benefit from regular feeding. Once the seedlings have established themselves (approximately 4-6 weeks after germination), start feeding them with a balanced liquid fertilizer every two weeks. Follow the recommended dosage on the package to avoid over-fertilization, which can lead to lush leaves but few flowers.
Step 9: Water Properly
Watering should be done when the top inch of soil feels dry to the touch. Ensure that you water thoroughly, allowing excess water to drain out of the bottom of the pot. Avoid letting the plants sit in standing water as it can lead to root rot.
Step 10: Monitor for Pests and Diseases
Though zinnias are generally resilient, pests such as aphids and spider mites can sometimes invade indoor plants. Regularly inspect your plants for signs of infestation. If you find pests, treat them promptly with insecticidal soap or neem oil. Additionally, watch for signs of fungal diseases, like powdery mildew, and ensure proper airflow around your plants.
Step 11: Support Growth
As the plants grow, they may need assistance as they become top-heavy. You can stake them using bamboo sticks or other lightweight supports to help them stand tall without bending or breaking.
Step 12: Encourage Blooming
To encourage flowering, consider deadheading—the process of removing faded blooms. Pinching off spent flowers directs the plant’s energy toward producing new blooms rather than setting seed.
Step 13: Harvesting Seeds
If you want to continue growing mini zinnias in the future, allow some flowers to go to seed at the end of the growing season. Once the flowers dry out, collect the seeds for planting later on. Store them in a cool, dry place until you’re ready to use them.
Troubleshooting Common Issues
- Leggy Plants: If your zinnias become tall and spindly, they may not be receiving enough light. Move them closer to the light source or switch to higher-intensity lighting.
- Yellow Leaves: Yellowing leaves can indicate overwatering, nutrient deficiency, or disease. Check your watering routine and consider fertilizing if necessary.
- Lack of Blooms: If your plants are healthy but not blooming, ensure they’re getting enough light and nutrients. Deadheading can also encourage more flowers.
Conclusion
Growing mini zinnias indoors can be a rewarding and vibrant way to liven up your living space. With the right conditions—adequate light, well-draining soil, and proper care—you can nurture these beautiful flowers from seed to bloom. Enjoy watching your mini zinnias flourish, bringing a touch of the outdoors inside while enhancing your home environment.
By following this step-by-step guide, you’ll be well on your way to creating a stunning indoor garden filled with colorful, resilient mini zinnias that can brighten up any space all year round. Happy gardening!