Grafting is one of the most powerful techniques in horticulture—especially when it comes to guava. If you’ve ever wished for a guava tree that grows faster, bears better-quality fruits, and resists diseases more effectively, grafting is the secret you’ve been looking for. Whether you’re a gardening beginner or an experienced grower wanting to refine your skills, learning how to graft guava can completely transform your garden.
This detailed guide explores the science, methods, tools, and tips behind successful guava grafting—so you can create vigorous, productive guava trees at home.
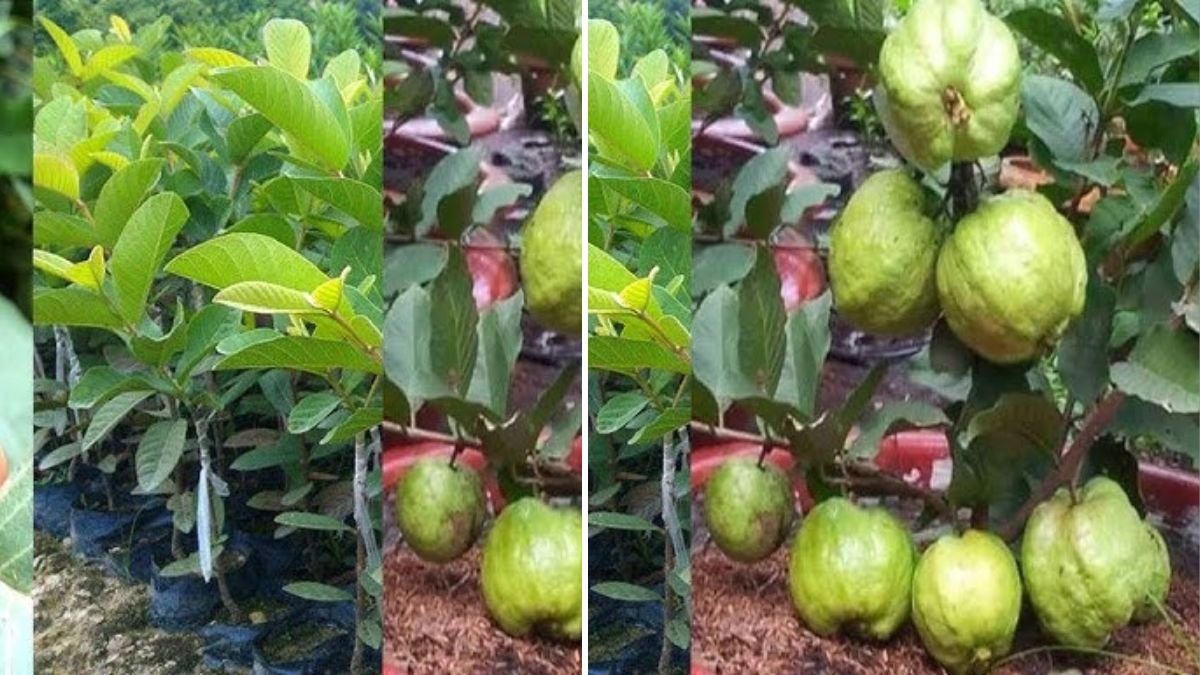
Why Graft a Guava Tree?
Guava is a hardy fruit tree, but seedlings often take longer to mature and may not produce fruits matching the quality of the parent plant. Grafting solves these problems by combining the best traits of two plants:
Benefits of Grafting Guava
✔ Early fruiting – Grafted guava trees can bear fruit in 1–2 years, much faster than seed-grown plants.
✔ Disease resistance – A strong rootstock gives resilience against soil-borne diseases.
✔ Guaranteed fruit quality – The scion is from a superior mother plant, ensuring predictable results.
✔ Better growth – Grafted trees grow uniformly and adapt well to various climates.
✔ Space-saving – Perfect for home gardeners with limited space.
What You Need for Grafting
Before you start, gather the right materials:
Latest Posts
- OnePlus 15T Smartphone Unveiled – Featuring 200MP Camera, Snapdragon 8 Elite Gen 5 and Massive Battery
- Lava Yuva 5G Unveiled – 120Hz Display and Strong Performance for Everyday Use
- Nokia 1100 Launched – Premium Keypad Phone Returns at Budget Price ₹2,500
- Motorola G96 5G Unveiled – Featuring Stylish Design, Strong Performance and Advanced Camera Tech
- Vivo Y21d Unveiled – Massive 6000mAh Battery for All-Day Everyday Use
- Nothing Phone 4 Ultra 5G Launched – 16GB RAM, AI-Powered 50MP Camera and Flagship Performance
- OnePlus 5G Smartphone Launched – 300MP AI Camera, 7000mAh Battery & 100W Fast Charging
- Nothing Phone 3a Pro – High processor smartphone for gaming lovers – battery is 5000mAH
- Realme 15 Pro – 3 days battery backup smartphone with 50MP front camera under ₹28,000
- Vivo X200 FE – 12GB RAM + 256GB Storage smartphone with HD quality camera
Tools & Materials
- Sharp grafting knife or blade
- Sterilizer (70% alcohol or flame)
- Grafting tape, budding tape, or polythene strips
- Healthy rootstock (6–12 months old guava plant)
- Fresh scion (disease-free branch from a high-quality guava tree)
- Pruning scissors
- Optional: grafting wax/gel
Clean tools are essential—contamination is the #1 cause of graft failure.
Selecting the Best Rootstock & Scion
Rootstock
Choose a young guava plant that is:
- 1–2 cm thick
- Pest-free and healthy
- Well-rooted and actively growing
- Drought and disease resistant
Scion Wood
Pick a branch that is:
- 3–6 months old
- Pencil-thick
- Firm (not too soft or too woody)
- With 3–4 healthy buds
Cut the scion early morning for freshness.
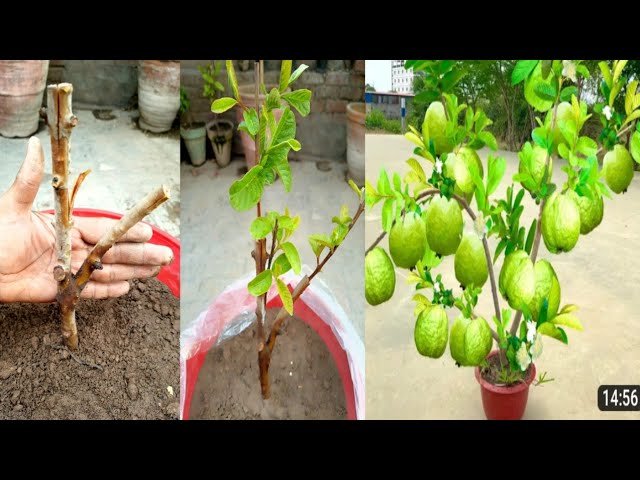
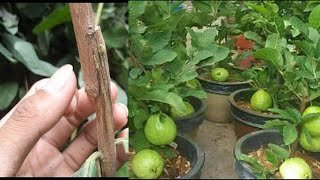
Best Grafting Methods for Guava
Guava accepts several grafting styles, but these three provide the highest success rates:
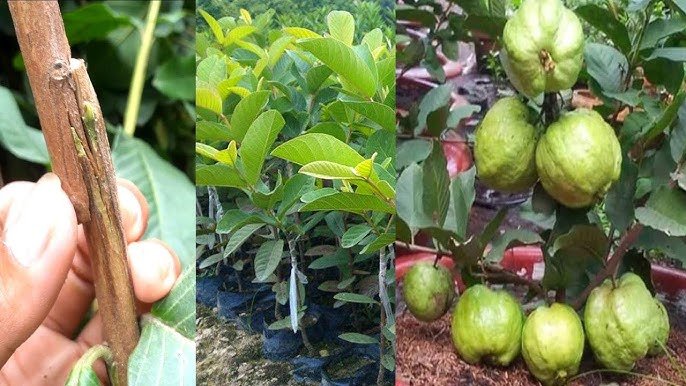
1. Cleft Grafting (Best for Beginners)
A simple and highly successful grafting method.
How to Do It
- Cut the top of the rootstock straight across.
- Make a vertical slit (around 3 cm deep).
- Shape the base of the scion into a wedge.
- Insert the scion into the slit, ensuring cambium-to-cambium contact.
- Wrap tightly with grafting tape.
- Cover the top with wax to prevent moisture loss.
Why It Works
It provides excellent alignment and is easy to perform even if you’re new to grafting.
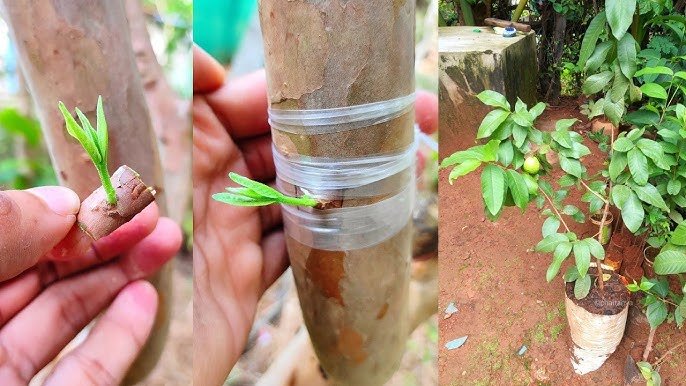
2. Veneer Grafting (High Success Rate)
Perfect for grafting onto thicker or older rootstocks.
Steps
- On the side of the rootstock, make a shallow downward slice (about 3–4 cm long).
- Prepare the scion by making a matching slanted cut.
- Place the scion onto the exposed rootstock wood.
- Secure tightly with tape.
Advantages
- Minimal damage to rootstock
- Quick healing
- Good for guava’s soft wood
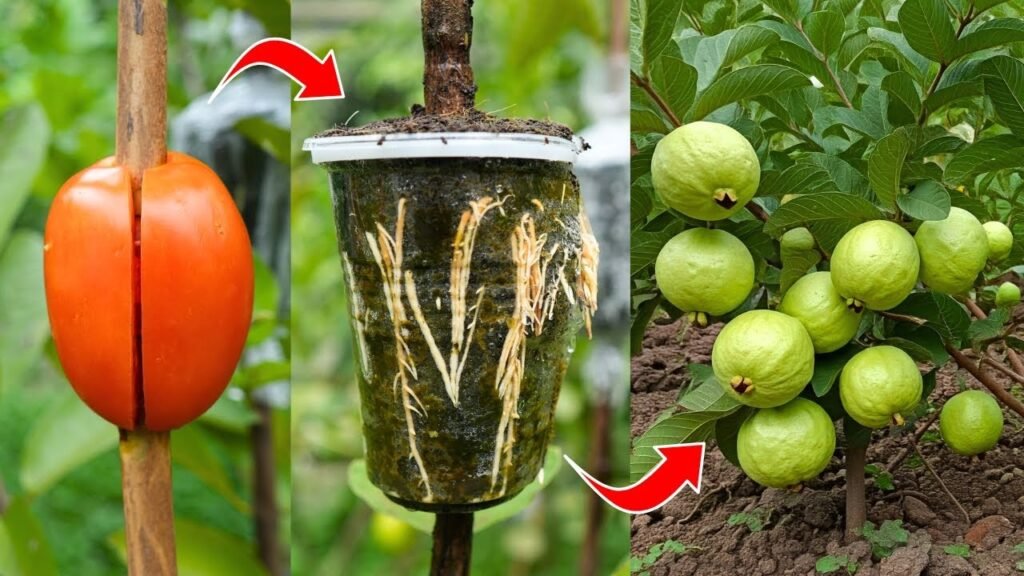
3. Approach Grafting (Failsafe Method)
Excellent for beginners or those wanting near-100% success.
How It Works
Both plants stay attached to their own roots until the graft heals.
Steps
- Keep rootstock and scion plants side by side.
- Remove a small strip of bark from both stems.
- Bind the exposed parts together tightly.
- After 4–6 weeks, once they fuse, cut the scion plant below the union and rootstock above the union.
Why It’s Reliable
Nutrients flow continuously, supporting strong grafting.
Best Season to Graft Guava
Timing is everything in grafting.
Ideal Months
- February–April (spring flush)
- July–September (monsoon growth period)
During these periods, guava plants are actively growing, ensuring faster healing.
Aftercare: The Secret to Success
Even a perfectly done graft can fail without proper aftercare.
Mist-watering
Spray lightly twice a day to keep the graft moist.
Shade protection
Place the plant in partial shade for 2–3 weeks.
Remove unnecessary shoots
Cut any new shoots emerging from the rootstock below the graft.
Check binding
The tape should stay tight—but not so tight that it cuts into the stem.
Hardening
After new leaves appear, gradually expose the plant to full sunlight.
Common Mistakes That Cause Graft Failure
Avoid these errors for higher success:
❌ Using thick or old scion wood
❌ Misalignment of cambium layers
❌ Loose or too-tight wrapping
❌ Grafting in extreme heat or winter
❌ Overwatering the plant
❌ Using infected or unsterilized tools
Small mistakes can lead to drying or rotting, so precision matters.
How Long Until Guava Starts Growing After Grafting?
- New buds appear: 2–4 weeks
- Tape removal: 6–8 weeks
- Strong shoot growth: 2–3 months
- Fruit-bearing: 1–2 years depending on care
This is far faster than seed-grown guava, which may take 3–6 years.
Extra Tips for Faster Graft Growth
- Use root hormone gel before inserting the scion.
- Keep the graft away from direct wind or harsh sun.
- Add organic compost every 45 days for healthy growth.
- Use fungicide spray once after grafting to prevent infection.
Conclusion: Grafting Makes Guava Growing Easier Than Ever
Grafting guava is a rewarding technique that brings fast results, healthier plants, and superior fruit quality. Whether you are growing guava in your backyard, terrace, or farm, grafting ensures a reliable, productive, and long-lasting tree.