Introduction
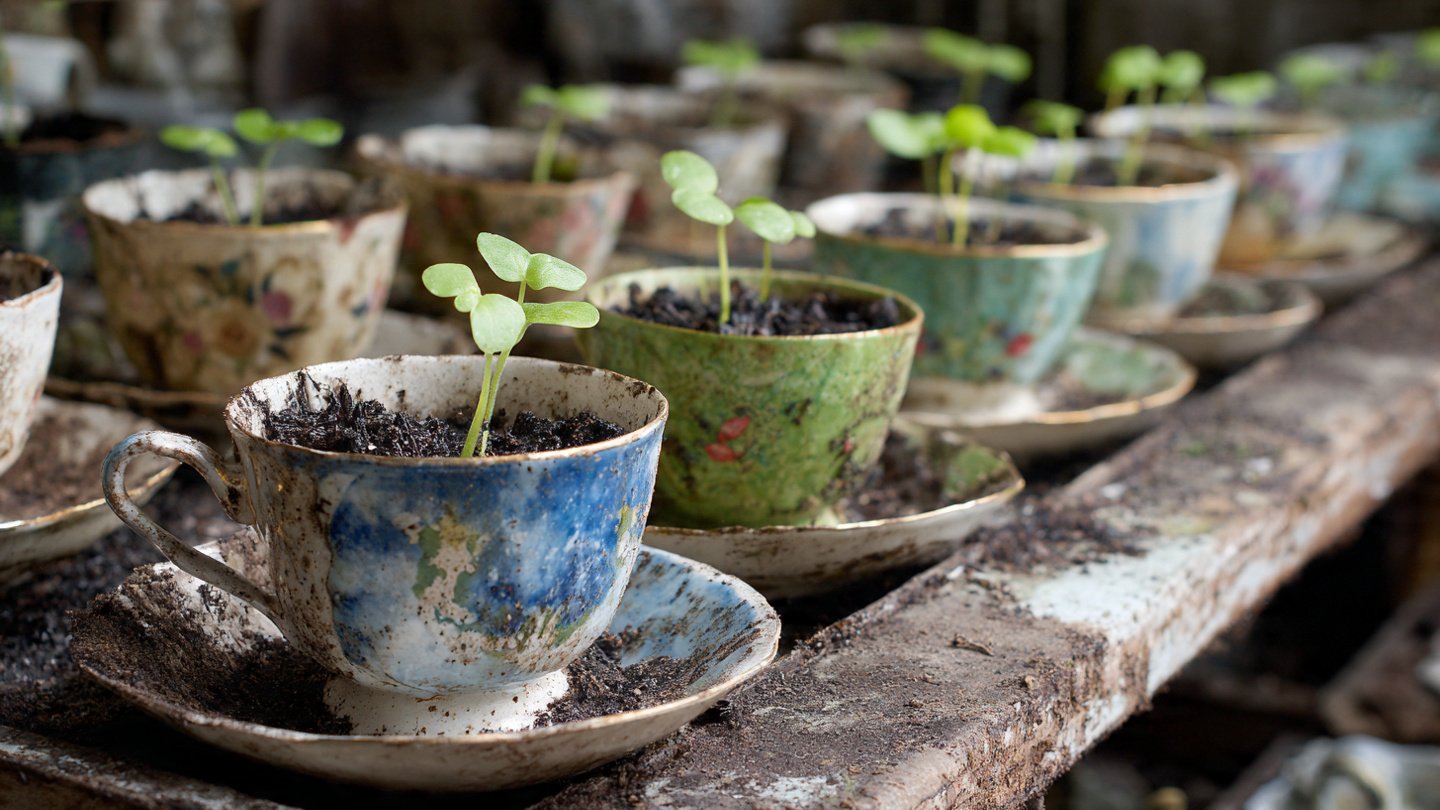
As spring approaches, gardeners everywhere begin to dream of planting new seeds and cultivating lush gardens. For those who enjoy both gardening and all things vintage, the idea of using old teacups as seed starters can be an exciting project. Not only do these charming pieces bring a touch of nostalgia and style to your gardening space, but they also offer unique advantages for starting seeds.
The Benefits of Using Old Teacups for Seed Starting
Latest Posts
- OnePlus 15T Smartphone Unveiled – Featuring 200MP Camera, Snapdragon 8 Elite Gen 5 and Massive Battery
- Lava Yuva 5G Unveiled – 120Hz Display and Strong Performance for Everyday Use
- Nokia 1100 Launched – Premium Keypad Phone Returns at Budget Price ₹2,500
- Motorola G96 5G Unveiled – Featuring Stylish Design, Strong Performance and Advanced Camera Tech
- Vivo Y21d Unveiled – Massive 6000mAh Battery for All-Day Everyday Use
- Nothing Phone 4 Ultra 5G Launched – 16GB RAM, AI-Powered 50MP Camera and Flagship Performance
- OnePlus 5G Smartphone Launched – 300MP AI Camera, 7000mAh Battery & 100W Fast Charging
- Nothing Phone 3a Pro – High processor smartphone for gaming lovers – battery is 5000mAH
- Realme 15 Pro – 3 days battery backup smartphone with 50MP front camera under ₹28,000
- Vivo X200 FE – 12GB RAM + 256GB Storage smartphone with HD quality camera
Old teacups can be an excellent option for anyone wanting to start seeds indoors or outdoors for several reasons:
- Drainage: Many teacups have small holes in the bottom, which can help with drainage. If not, creating drainage holes is simple with a small drill or nail.
- Size: Teacups are the perfect size for starting small seeds and allow for easy transplanting when the seedlings are ready.
- Portability: The lightweight nature of teacups makes them easy to move around, ensuring that you can place them in the best light conditions.
- Aesthetic Appeal: Using teacups adds a decorative element to your gardening, turning your seedlings into a charming display.
How to Prepare Your Teacups for Seed Starting
Before you start planting, it’s essential to prepare your teacups properly. Here’s a step-by-step guide:
Step 1: Choose Your Teacups
Select the teacups you want to use. Look for ones that are lightweight and have an appealing design—thrift stores and garage sales often have beautiful examples. Avoid teacups that are chipped or damaged.
Step 2: Create Drainage Holes
If your teacups don’t already have drainage holes, use a small drill or a heated nail to poke holes in the bottom. Proper drainage is critical to prevent root rot.
Step 3: Clean Your Teacups
Wash your teacups thoroughly to remove any residue or contaminants that might harm your seeds.
Step 4: Add Potting Mix
Fill each teacup with quality potting mix. Leave about half an inch of space at the top to allow for watering.
Choosing the Right Seeds
When it comes to selecting seeds for your teacups, consider the following:
- Small Seeds: Opt for fast-growing small seeds such as herbs (basil, parsley), flowers (petunias, marigolds), or compact vegetable varieties (lettuce, radishes).
- Growing Season: Start seeds that thrive in your growing zone and can be transplanted after the last frost.
Planting Your Seeds in Teacups
Now that you have your teacups prepared, it’s time to plant your seeds:
Step 1: Plant the Seeds
Make small indentations in the potting mix using your finger or a pencil. Place one to three seeds in each indentation, depending on the seed size. Cover them lightly with soil and gently pat down.
Step 2: Water
Water the teacups carefully using a spray bottle or watering can with a narrow spout, ensuring the soil is moistened but not waterlogged.
Step 3: Create a Greenhouse Effect
Cover your teacups with clear plastic wrap to create a greenhouse effect, maintaining humidity and warmth. Remove the plastic wrap once seedlings emerge.
Displaying Your Teacups
Once your seeds have sprouted, think about how you want to display your teacups. Here are a few ideas:
- Windowsills: Place your teacups on windowsills that receive ample sunlight.
- Garden Shelves: Create a charming display on shelves or tables in your garden area.
- Hanging Displays: Use twine or fishing line to hang teacups from a fence or balcony for a whimsical touch.
Transplanting Your Seedlings
When your seedlings are ready for transplanting (usually after about 4-6 weeks or once they have a few sets of true leaves), follow these steps:
Step 1: Harden Off
Before moving your seedlings outdoors, harden them off by gradually exposing them to outdoor conditions over a week.
Step 2: Prepare Outdoor Beds
Prepare your garden beds or pots, ensuring they are enriched with compost or organic fertilizer.
Step 3: Transplant
Carefully remove the seedlings from the teacups. If needed, you can break the teacup for easier removal. Transplant them into their new homes, being careful to keep the roots intact.
Conclusion
Using old teacups to start your spring seeds is not only resourceful but also an enjoyable way to blend gardening with creativity. By repurposing these charming vintage items, you can elevate the aesthetic of your gardening space while nurturing new life. Whether you’re an experienced gardener or a beginner, creating a teacup garden is a delightful project that can enhance your home and contribute to your gardening journey.
FAQs
1. Can I use any type of teacup for starting seeds?
Yes, any lightweight teacup that holds soil and allows for drainage is suitable. Just ensure that it isn’t too large for the seeds you’re starting.
2. What if my teacup doesn’t have drainage holes?
You can easily make drainage holes with a small drill or a heated nail. Just ensure you create holes that are large enough for excess water to escape.
3. How often should I water my teacup seedlings?
Water your seedlings when the top inch of soil feels dry. Be cautious not to overwater, as teacups can retain moisture.
4. Can I keep my seedlings in the teacups for an extended period?
It’s best to transplant seedlings into larger pots or into the ground once they have 2-3 sets of true leaves and are ready for outdoor conditions.
5. What types of seeds work best in teacups?
Small seeds, such as certain herbs, flowers, and compact vegetables, generally work best due to the size limitations of teacups.