Hibiscus plants, with their vibrant flowers and lush foliage, are a favorite among gardeners and plant enthusiasts. Known for their beauty and resilience, these plants can be propagated quite easily. One of the most effective methods is rooting hibiscus stems in sand. This technique not only hastens the rooting process but also promotes strong and healthy growth in the new plants. In this article, we’ll delve into the step-by-step process, benefits, and tips for successfully rooting hibiscus stems in sand.
Understanding Hibiscus Propagation
Before embarking on the propagation journey, it’s essential to understand the types of hibiscus and their propagation preferences. Hibiscus can be primarily categorized into two types: tropical hibiscus and perennial hibiscus. Both types can be propagated through stem cuttings, but tropical hibiscus tends to root more quickly in sandy mediums.
Latest Posts
- OnePlus 15T Smartphone Unveiled – Featuring 200MP Camera, Snapdragon 8 Elite Gen 5 and Massive Battery
- Lava Yuva 5G Unveiled – 120Hz Display and Strong Performance for Everyday Use
- Nokia 1100 Launched – Premium Keypad Phone Returns at Budget Price ₹2,500
- Motorola G96 5G Unveiled – Featuring Stylish Design, Strong Performance and Advanced Camera Tech
- Vivo Y21d Unveiled – Massive 6000mAh Battery for All-Day Everyday Use
- Nothing Phone 4 Ultra 5G Launched – 16GB RAM, AI-Powered 50MP Camera and Flagship Performance
- OnePlus 5G Smartphone Launched – 300MP AI Camera, 7000mAh Battery & 100W Fast Charging
- Nothing Phone 3a Pro – High processor smartphone for gaming lovers – battery is 5000mAH
- Realme 15 Pro – 3 days battery backup smartphone with 50MP front camera under ₹28,000
- Vivo X200 FE – 12GB RAM + 256GB Storage smartphone with HD quality camera
Why Use Sand for Rooting?
Using sand as a medium for rooting hibiscus stems comes with several advantages:
-
Well-draining Properties: Sand offers excellent drainage, which is crucial for preventing root rot during the delicate rooting stage.
-
Aeration: The loose structure of sand allows air to reach the developing roots, promoting healthy growth.
-
Temperature Regulation: Sand can retain warmth, which is essential for quick root development.
-
Minimal Nutrient Presence: Using sand ensures that the cuttings focus on root development rather than foliage growth, leading to faster rooting.
Step-by-Step Guide to Rooting Hibiscus Stem in Sand
Step 1: Selecting the Right Cutting
-
Timing: The best time to take cuttings is during the growing season, typically in spring or early summer.
-
Selecting a Stem: Choose a healthy, semi-hardwood stem that is about 4-6 inches long. Look for stems that have several leaf nodes but are not blooming.
-
Preparation: Using clean, sharp pruning shears, make a diagonal cut just below a leaf node. This increases the surface area for root development.
Step 2: Preparing the Cutting
-
Remove Lower Leaves: Carefully strip off the lower leaves, leaving at least one or two sets of leaves at the top to aid in photosynthesis.
-
Optional – Apply Rooting Hormone: Although not necessary, applying a rooting hormone to the cut end can enhance the chances of successful rooting.
Step 3: Preparing Your Sand Medium
-
Select the Right Sand: Use coarse sand or a sand mix that allows for adequate drainage. Avoid fine sand as it can compact easily.
-
Sterilize the Sand: To minimize disease risks, sterilize the sand by baking it in the oven at 180°F for about 30 minutes. Let it cool before use.
-
Fill the Container: Use a small container with drainage holes and fill it with the sterilized sand, ensuring it is packed but not too compact.
Step 4: Planting the Cutting
-
Create a Hole: Use a pencil or stick to create a small hole in the sand for the cutting.
-
Insert the Cutting: Place the cutting gently into the hole, making sure not to damage the stem. Firmly pack the sand around the cutting to ensure it stands upright.
-
Watering: Give the cutting a light watering to moisten the sand. The medium should be damp but not soggy.
Step 5: Providing the Right Environment
-
Humidity: Cover the container with a plastic bag or place it in a propagating dome to create a humid environment. Ensure that the plastic does not touch the leaves to prevent rot.
-
Light: Place the container in a location where it will receive bright, indirect sunlight. Avoid direct sunlight, which can scorch the cutting.
-
Temperature: Maintain a warm environment, ideally between 70°F and 80°F.
Step 6: Watering and Care
-
Monitor Moisture: Check the moisture level regularly. Lightly mist the sand if it starts to dry out, but avoid overwatering.
-
Rooting Time: Hibiscus cuttings typically take 2-4 weeks to root. You can check for roots by gently tugging on the cutting; resistance indicates root development.
Step 7: Transplanting
Once the cutting has developed a healthy root system, you can transplant it into a larger pot filled with soil suitable for hibiscus. Choose a pot with adequate drainage to support the growing plant.
Benefits of Rooting Hibiscus in Sand
- Fast Root Development: The well-draining nature of sand leads to quicker root formation.
- Reduced Risk of Disease: The sterile environment provided by clean sand minimizes fungal infections and rot.
- Simplicity: This method is straightforward and does not require complex setups.
Troubleshooting Common Issues
-
Wilting Leaves: This can indicate either overwatering or underwatering. Adjust the watering frequency until the right balance is found.
-
Mold or Fungus: If mold develops on the surface, reduce humidity and ensure proper air circulation around the cutting.
-
Slow Growth: Check environmental conditions such as light, temperature, and water. Ensure they are optimal for growth.
Frequently Asked Questions (FAQs)
1. How long does it take for hibiscus cuttings to root in sand?
Typically, hibiscus cuttings take 2 to 4 weeks to develop roots when propagated in sand.
2. Can I use garden soil instead of sand?
While garden soil can be used, it may retain too much moisture and does not provide the same level of drainage or aeration as sand, which is crucial for successful rooting.
3. Do I need to cover my cuttings after planting?
Yes, covering the cuttings helps maintain humidity, which is essential for root development. However, ensure that the covering does not touch the leaves to prevent rot.
4. How do I know if my cutting has rooted?
You can check for roots by gently tugging the cutting. If you feel resistance, it’s likely that roots have formed.
5. What is the best time of year to take hibiscus cuttings?
The best time for taking cuttings is during the growing season, usually in spring or early summer.
6. Can I take cuttings from a blooming hibiscus plant?
It is best to avoid taking cuttings from blooming plants as they may expend energy on flower production rather than root development.
7. Do I need special equipment for this technique?
No special equipment is required. Basic gardening tools such as shears, containers, and clean sand are sufficient for this method.
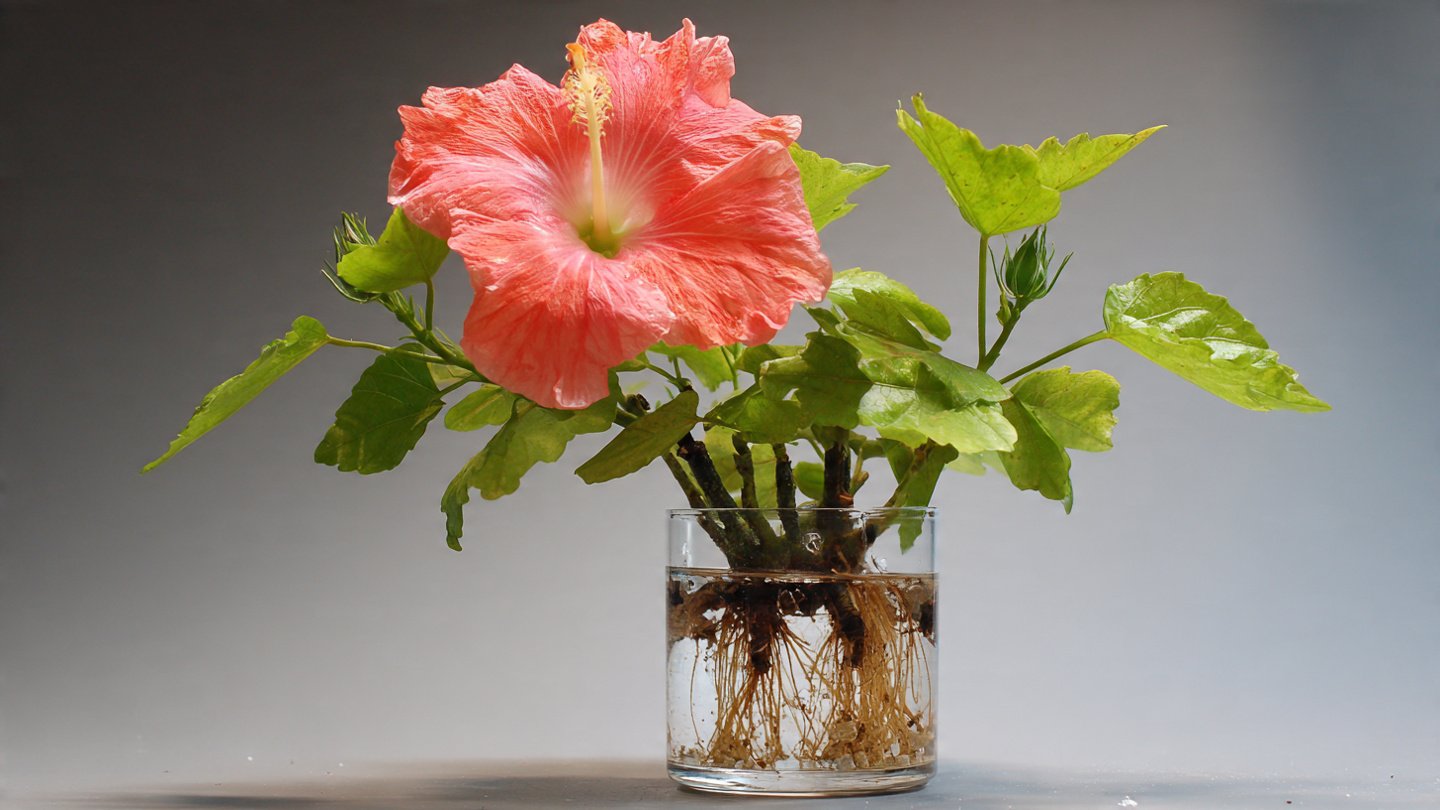
8. Can I propagate hibiscus in water instead of sand?
While propagation in water is possible, sand provides a better environment for quick root development and reduces the risk of rot.
Conclusion
Rooting hibiscus stems in sand is a simple yet effective technique that fosters fast growth in new plants. By following the step-by-step process outlined in this article, gardeners can enjoy the satisfying experience of nurturing new hibiscus plants from cuttings. With proper care, patience, and attention to detail, your hibiscus cuttings will thrive and bring vibrant colors to your garden or home.