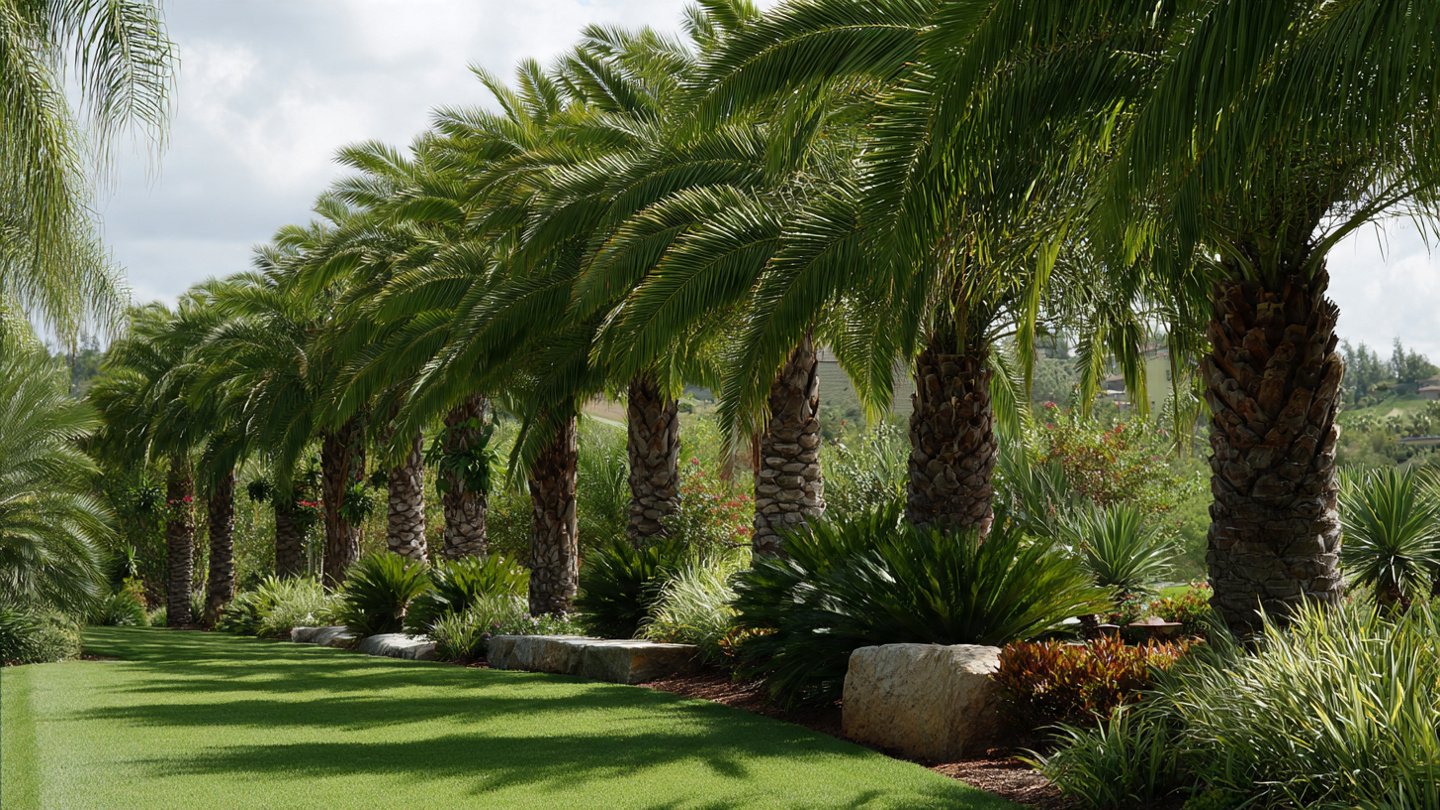
Bottle palms (Hyophorbe lagenicaulis) are a unique and attractive species native to the Mascarene Islands in the Indian Ocean. These palms are renowned for their distinctive bottle-shaped trunks and lush, elegantly arching fronds. With their tropical appearance, they are perfect for adding a touch of paradise to your lawn. However, successfully growing them requires an understanding of their specific needs and care guidelines. In this article, we’ll explore the easy steps to grow bottle palms year-round and address some frequently asked questions.
Understanding the Bottle Palm
Characteristics
Latest Posts
- OnePlus 15T Smartphone Unveiled – Featuring 200MP Camera, Snapdragon 8 Elite Gen 5 and Massive Battery
- Lava Yuva 5G Unveiled – 120Hz Display and Strong Performance for Everyday Use
- Nokia 1100 Launched – Premium Keypad Phone Returns at Budget Price ₹2,500
- Motorola G96 5G Unveiled – Featuring Stylish Design, Strong Performance and Advanced Camera Tech
- Vivo Y21d Unveiled – Massive 6000mAh Battery for All-Day Everyday Use
- Nothing Phone 4 Ultra 5G Launched – 16GB RAM, AI-Powered 50MP Camera and Flagship Performance
- OnePlus 5G Smartphone Launched – 300MP AI Camera, 7000mAh Battery & 100W Fast Charging
- Nothing Phone 3a Pro – High processor smartphone for gaming lovers – battery is 5000mAH
- Realme 15 Pro – 3 days battery backup smartphone with 50MP front camera under ₹28,000
- Vivo X200 FE – 12GB RAM + 256GB Storage smartphone with HD quality camera
Bottle palms can grow up to 20 feet tall, but they are slow growers, typically reaching about 10-15 feet in height in a more subdued setting. Their most remarkable feature is their swollen trunk base, which helps store water and nutrients, making them drought-tolerant once established.
Ideal Growing Conditions
- Climate: Bottle palms thrive in USDA hardiness zones 10-11. They prefer tropical and subtropical climates.
- Soil Type: Well-draining sandy or loamy soils are ideal. Poorly drained or heavy clay soils can lead to root rot.
- Sunlight: These palms prefer full sun, but they can tolerate partial shade, especially when young.
Step-by-Step Guide to Growing Bottle Palms
1. Choosing the Right Location
Before planting, it’s crucial to select the right location in your lawn. Choose an area that receives plenty of sunlight for most of the day, ideally six to eight hours. Ensure the space is free from strong winds, as bottle palms can be susceptible to wind damage.
2. Soil Preparation
Proper soil preparation is essential for the health of your bottle palm. Follow these steps:
- Testing Soil: Use a soil test kit to check pH and nutrient levels. Bottle palms prefer slightly acidic to neutral pH (6.0 to 7.0).
- Amending Soil: If necessary, amend your soil with organic matter such as compost or peat moss to improve drainage and nutrient content. Adding sand to heavy soils can be beneficial.
3. Planting Bottle Palms
Once the location and soil are prepared, follow these steps for planting:
- Digging the Hole: Create a hole twice the width of the root ball and about the same depth. This will allow for better root spread.
- Positioning the Palm: Place the bottle palm in the center of the hole, ensuring that the top of the root ball is level with the surrounding soil.
- Backfilling the Hole: Fill the hole with native soil and lightly pack it around the root ball, avoiding compaction, which can impede root growth.
- Watering: After planting, water generously to settle the soil around the roots.
4. Watering Needs
Bottle palms are relatively drought-tolerant once established. However, they do require consistent moisture when young. Here’s how to manage their watering needs:
- Initial Care: Water the palm deeply once a week for the first few months after planting.
- Established Plants: Once established, reduce watering frequency. Water only during prolonged dry spells.
5. Fertilizing
Bottle palms benefit from regular feeding, especially during the growing season (spring and summer).
- Choosing Fertilizer: Opt for a balanced slow-release fertilizer that’s rich in potassium and magnesium, as palms can suffer from nutrient deficiencies.
- Application: Fertilize every 4-6 weeks during the growing season, following package instructions to avoid over-fertilization.
6. Pruning and Maintenance
Regular maintenance will keep your bottle palm healthy and looking its best.
- Cleaning: Remove any dead or yellow fronds as they appear. This encourages new growth and prevents pest infestations.
- Fertilizer Application: Ensure no fertilizer accumulates at the base of the trunk, as it can cause deterioration.
7. Pest and Disease Management
Bottle palms can be susceptible to various pests and diseases. Keep an eye out for:
- Spider Mites: These tiny pests can cause discoloration and wilting. Increase humidity or apply insecticidal soap if an infestation occurs.
- Aphids: Look for clusters of these small insects on new growth. Neem oil or insecticidal soap can help control them.
- Root Rot: This can occur if the roots sit in waterlogged soil. Ensure your palm is planted in well-draining soil and avoid overwatering.
8. Winter Care
In colder areas where temperatures can drop near freezing, additional care may be required during the winter months.
- Mulching: Apply a layer of mulch around the base in late fall to insulate the roots and retain moisture.
- Wrapping: For younger trees, consider wrapping the trunk with burlap to protect it from frost.
9. Propagation
Bottle palms can be propagated through seeds, but this process can be slow and requires patience. Obtaining seeds from a reputable nursery is ideal. Here are the steps for propagation:
- Seed Preparation: Soak seeds in warm water for 24 hours before planting to enhance germination.
- Planting Seeds: Sow seeds in a well-draining potting mix and keep them lightly moist and in warm temperatures.
- Germination Time: Expect germination to take 3-8 months, depending on conditions.
Frequently Asked Questions (FAQs)
Q1: How long does it take for a bottle palm to mature?
Bottle palms are slow growers. Depending on the conditions, they may take anywhere from 10-15 years to reach their maximum height of 10-20 feet.
Q2: Can bottle palms survive winter temperatures?
Bottle palms are not frost-tolerant. In colder climates, they need protection from freezing temperatures through mulching or wrapping the trunk.
Q3: What if my bottle palm’s fronds turn yellow?
Yellowing fronds can indicate nutrient deficiencies or overwatering. Assess your watering routines and consider fertilizing to restore health.
Q4: Do bottle palms attract pests?
Like all plants, bottle palms can attract pests such as aphids and spider mites. Regular inspection and proper maintenance can help mitigate these issues.
Q5: Can bottle palms be grown indoors?
While bottle palms can be grown indoors, they require bright, indirect sunlight and suitable humidity levels. Ensure proper care to avoid stress.
Q6: Is it necessary to prune bottle palms?
Pruning is not required but can enhance appearance by removing dead or damaged fronds. Always use clean, sharp tools to minimize stress on the plant.
Q7: How often should I fertilize my bottle palm?
During the growing season (spring and summer), apply a slow-release fertilizer every 4-6 weeks based on manufacturer’s guidelines.
Conclusion
Growing bottle palms can be a rewarding experience, creating a lush, tropical look for any lawn area. By following these easy steps and understanding their specific needs, you can ensure that your bottle palms thrive year-round. With proper care, these charming palms will become a cherished feature of your landscape, offering a unique aesthetic appeal and a touch of tropical elegance in your garden. Whether you are a novice gardener or a seasoned green thumb, bottle palms can enhance your outdoor space with their stunning beauty. Happy gardening!