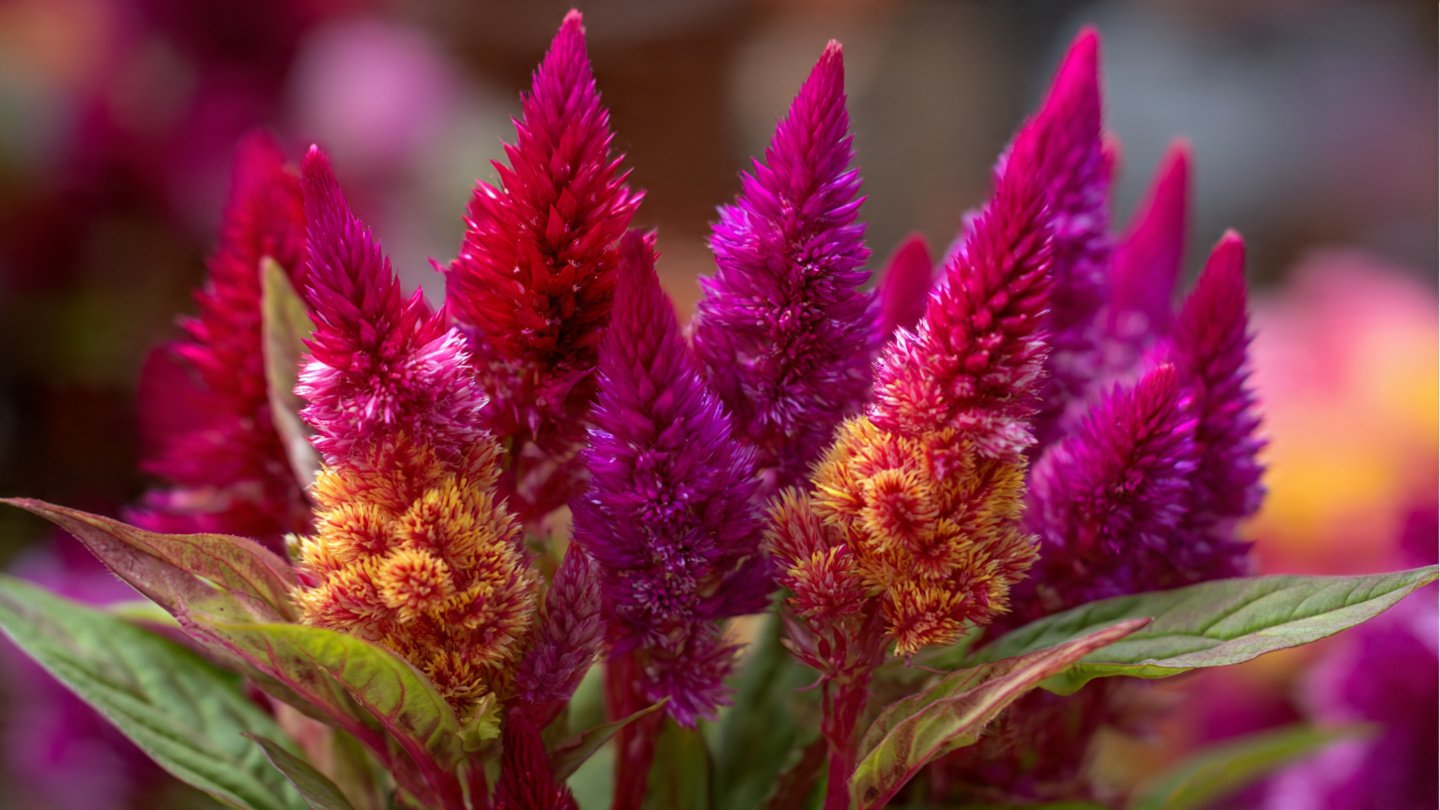
Celosia, known for its stunning, plume-like blooms, has captivated gardeners with its unique appearance and vibrant colors. From fiery reds to cheerful yellows and soft pinks, these flowers create a visual feast in any garden. Whether you’re a seasoned gardener or a beginner looking to add a splash of color, growing celosia from seed is a rewarding endeavor. This guide will provide you with all the necessary steps and tips to cultivate beautiful celosia blooms successfully.
Understanding Celosia
Types of Celosia
Celosia belongs to the Amaranthaceae family and includes several species, with the most popular being:
- Celosia argentea: Known for its plumed varieties that resemble feather-like spikes.
- Celosia cristata: Commonly referred to as cockscomb, this species has a unique brain-like flower head.
These varieties not only differ in appearance but also in growth habits and climate preferences, making it essential to choose the right type for your garden.
Growing Conditions
Celosia thrives in warm conditions. It’s a tender annual that flourishes in USDA zones 10 and above. Here are some essential conditions for growth:
- Temperature: Celosia prefers warm temperatures ranging from 70°F to 86°F (21°C to 30°C).
- Sunlight: Full sun is necessary for optimal growth, requiring at least six hours of direct sunlight daily.
- Soil: A well-draining soil rich in organic matter is crucial. Aim for a pH level between 6.0 and 7.0 for best results.
Preparing to Plant Celosia Seeds
Selecting Seeds
The first step in your celosia-growing journey is selecting the right seeds. You can purchase seeds from a reputable garden center or online retailers. Consider choosing a variety that suits your gardening style and climate.
Latest Posts
- OnePlus 15T Smartphone Unveiled – Featuring 200MP Camera, Snapdragon 8 Elite Gen 5 and Massive Battery
- Lava Yuva 5G Unveiled – 120Hz Display and Strong Performance for Everyday Use
- Nokia 1100 Launched – Premium Keypad Phone Returns at Budget Price ₹2,500
- Motorola G96 5G Unveiled – Featuring Stylish Design, Strong Performance and Advanced Camera Tech
- Vivo Y21d Unveiled – Massive 6000mAh Battery for All-Day Everyday Use
- Nothing Phone 4 Ultra 5G Launched – 16GB RAM, AI-Powered 50MP Camera and Flagship Performance
- OnePlus 5G Smartphone Launched – 300MP AI Camera, 7000mAh Battery & 100W Fast Charging
- Nothing Phone 3a Pro – High processor smartphone for gaming lovers – battery is 5000mAH
- Realme 15 Pro – 3 days battery backup smartphone with 50MP front camera under ₹28,000
- Vivo X200 FE – 12GB RAM + 256GB Storage smartphone with HD quality camera
Timing
Timing your planting correctly is crucial. Celosia seeds can be started indoors or sown directly outdoors.
- Indoors: Start seeds about 6-8 weeks before the last frost date in your area.
- Outdoors: Wait until after the last frost before sowing seeds directly in the garden.
Gathering Supplies
Before you start planting, gather your supplies. You’ll need:
- Seed trays or pots (if starting indoors)
- Seed-starting mix or a light, well-draining soil
- Watering can or misting spray bottle
- Labels and markers (optional)
Starting Celosia Seeds Indoors
If you’re starting your seeds indoors, follow these steps:
1. Fill Seed Trays
Fill your seed trays or pots with the seed-starting mix. Make sure the soil is light and fluffy, allowing for good drainage and aeration.
2. Sow the Seeds
Sow the celosia seeds on the surface of the soil. Celosia seeds are very small, so sprinkle them lightly rather than burying them deeply. A thin layer of soil or vermiculite can be added on top; however, many gardeners prefer to leave them uncovered to optimize germination.
3. Watering
Use a misting spray bottle to gently moisten the soil without displacing the seeds. The soil should be damp but not soaking wet.
4. Create the Right Environment
Cover the seed trays with plastic wrap or a humidity dome to maintain moisture levels. Place the trays in a warm location or use a heat mat if needed. Remove the cover once seedlings emerge.
5. Light Requirements
Once the seedlings appear (typically within 7-14 days), ensure they receive ample light. If natural light is insufficient, consider using grow lights positioned a few inches above the seedlings, adjusting as they grow.
6. Thinning
Once seedlings develop their first true leaves, thin them out by snipping weaker plants at the base, leaving the healthiest ones spaced about 2-4 inches apart.
Transplanting Celosia Outdoors
Once the seedlings have grown sufficiently and the outdoor temperatures are consistently warm, you can transplant them into your garden.
1. Hardening Off
Before transplanting, acclimate your seedlings to outdoor conditions by hardening them off. Gradually expose them to outdoor temperatures, starting with a few hours of sunlight and increasing the time over a week.
2. Selecting a Planting Location
Choose a location that receives full sun and has well-draining soil. Ideally, the site should be sheltered from strong winds, particularly for taller varieties.
3. Planting
Dig holes that are twice the size of the root ball of each seedling. Space plants about 8-12 inches apart, depending on the variety. Gently remove the seedlings from their containers and place them in the holes, filling in the soil around the roots.
4. Watering
After planting, water the area thoroughly to help settle the soil. Continue to water regularly, especially during dry spells.
Caring for Celosia Throughout the Growing Season
1. Watering
Celosia prefers evenly moist soil but is drought-tolerant once established. Water deeply and less frequently to encourage deep root growth.
2. Fertilization
A balanced, slow-release fertilizer applied during the growing season will promote healthy growth. Avoid over-fertilizing, as this can lead to excess foliage and fewer blooms.
3. Weeding and Mulching
Regularly check for weeds to prevent competition for nutrients. Applying a layer of organic mulch will help retain moisture and suppress weed growth.
4. Pest and Disease Control
Celosia is generally resistant to pests and diseases, but keep an eye out for aphids, spider mites, and fungal diseases. If you notice any signs of trouble, use insecticidal soap or neem oil for treatment.
Harvesting Celosia
Once your celosia blooms reach their full color and size, it’s time to enjoy them! Here’s how to harvest and use them:
1. Cutting Flowers
Cut flowers in the morning or late in the afternoon when temperatures are cooler. Use sharp, clean scissors and cut the stems at an angle, around 6-12 inches from the base of the plant.
2. Arranging Flowers
Celosia flowers make beautiful additions to bouquets and arrangements. They also dry well, so you can hang them upside down in a dark, dry area to create stunning, everlasting displays.
3. Deadheading
Regular deadheading (removing faded blooms) encourages the plant to produce more flowers. This practice keeps your celosia looking fresh throughout the growing season.
Common Challenges and Solutions
1. Poor Germination
If your seeds are not germinating, check the following:
- Ensure the soil is consistently moist but not waterlogged.
- Confirm the temperature is warm enough for germination.
- Use fresh seeds, as older seeds may have reduced viability.
2. Leggy Plants
If seedlings are stretching toward the light, they may not be receiving enough sunlight. Move seedlings to a brighter location or adjust your grow lights to be closer.
3. Wilting and Yellowing Leaves
Wilting can indicate over- or under-watering. Check soil moisture levels and adjust your watering practices accordingly. Yellowing leaves may also suggest nutrient deficiencies.
Conclusion
Growing celosia from seed is a fulfilling gardening project that rewards you with breathtaking blooms. With the right conditions and care, you can cultivate these vibrant flowers to enhance your garden and create stunning floral arrangements. By following the steps outlined in this guide—from seed selection and planting to care and harvesting—you’ll be well-equipped to ensure a successful celosia-growing experience. Embrace the beauty of celosia flowers in your garden, and enjoy the burst of color they bring into your life!