Microgreens are nutrient-dense young plants that have taken the culinary world by storm, and for good reason. Packed with flavor, vibrant colors, and a host of health benefits, these tiny greens make an excellent addition to salads, sandwiches, and garnishes. The great news is that microgreens can be grown indoors year-round, providing fresh produce regardless of the season. This article will explore how to effectively cultivate microgreens inside your home, from selecting seeds to harvesting, and ensuring a thriving indoor garden.
1. Understanding Microgreens
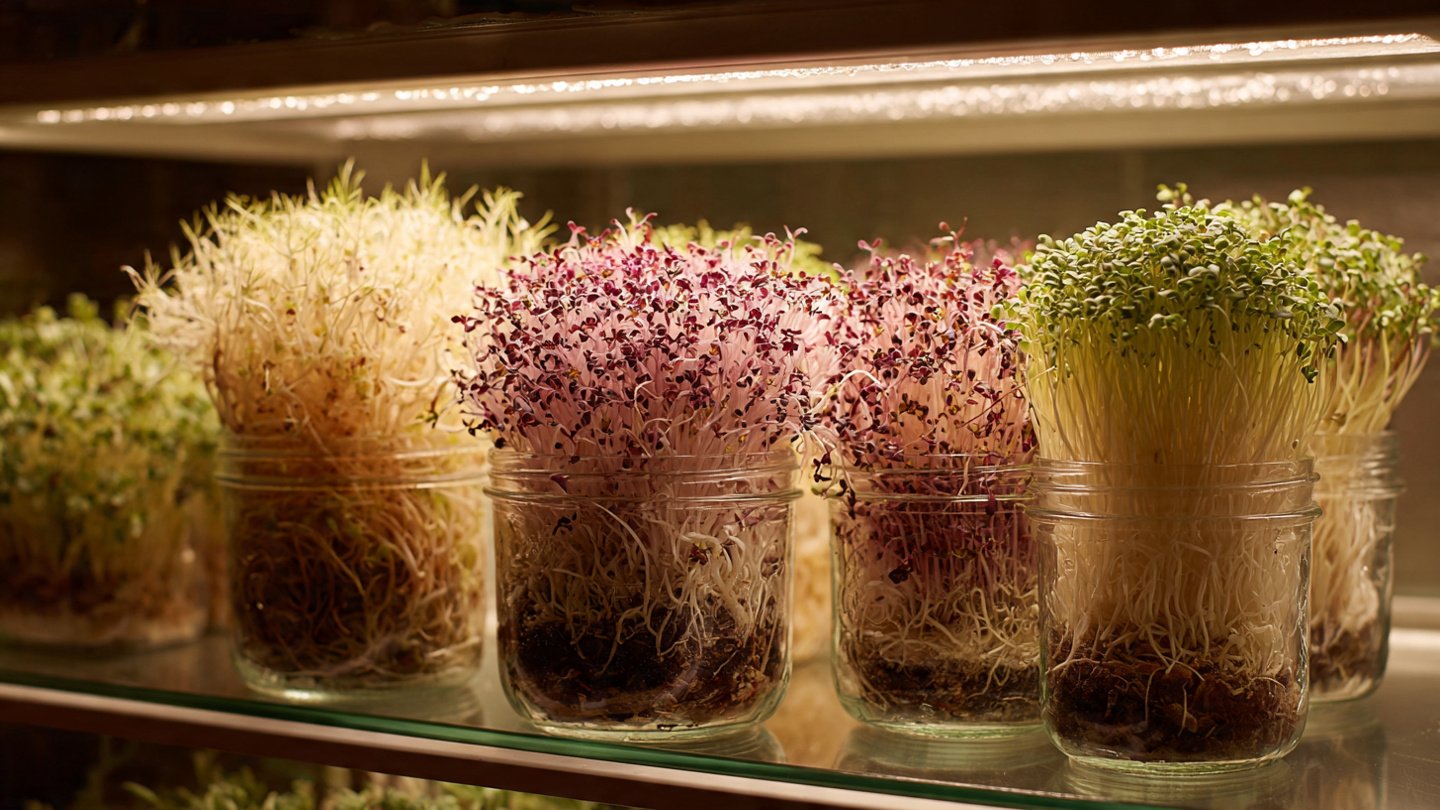
Microgreens are the seedlings of edible vegetables and herbs, typically harvested just after they have developed their first true leaves. They are commonly used for their flavor, nutritional value, and aesthetic appeal in dishes. Some popular microgreens include:
Latest Posts
- OnePlus 15T Smartphone Unveiled – Featuring 200MP Camera, Snapdragon 8 Elite Gen 5 and Massive Battery
- Lava Yuva 5G Unveiled – 120Hz Display and Strong Performance for Everyday Use
- Nokia 1100 Launched – Premium Keypad Phone Returns at Budget Price ₹2,500
- Motorola G96 5G Unveiled – Featuring Stylish Design, Strong Performance and Advanced Camera Tech
- Vivo Y21d Unveiled – Massive 6000mAh Battery for All-Day Everyday Use
- Nothing Phone 4 Ultra 5G Launched – 16GB RAM, AI-Powered 50MP Camera and Flagship Performance
- OnePlus 5G Smartphone Launched – 300MP AI Camera, 7000mAh Battery & 100W Fast Charging
- Nothing Phone 3a Pro – High processor smartphone for gaming lovers – battery is 5000mAH
- Realme 15 Pro – 3 days battery backup smartphone with 50MP front camera under ₹28,000
- Vivo X200 FE – 12GB RAM + 256GB Storage smartphone with HD quality camera
- Basil
- Cilantro
- Radish
- Sunflower
- Pea shoots
With a variety of tastes and textures, the type of microgreen you grow can influence your dishes in unique ways.
1.1 Nutritional Benefits
Microgreens are known for their high nutrient concentrations. Research suggests that some microgreens contain up to 40 times more nutrients than their mature counterparts. They are rich in vitamins, minerals, and antioxidants, making them an excellent dietary choice.
2. Getting Started: Supplies You’ll Need
2.1 Containers
When growing microgreens indoors, the type of container you choose plays a crucial role. Options include:
- Seed trays: Shallow trays with drainage holes are ideal for microgreens.
- Recycled containers: You can repurpose containers from takeout or other store-bought food, provided they can drain excess water.
- Hydroponic systems: For those interested in a more tech-savvy approach, hydroponics can yield great results.
2.2 Growing Medium
Choosing the right growing medium is essential for microgreen success:
- Soil: A lightweight, well-draining potting mix is ideal. You can also use seed-starting mixes designed for germination.
- Coconut coir: This sustainable option retains moisture while providing good drainage.
- Hydroponic mats: For a soilless approach, consider using specialized mats that can hold moisture.
2.3 Seeds
Select high-quality, organic seeds designed specifically for microgreens. Look for varieties that are easy to grow, such as:
- Broccoli
- Mustard
- Arugula
- Beet greens
Make sure seeds are untreated and free from pesticides.
2.4 Light Source
Microgreens need ample light to thrive. Since you’re growing indoors, consider:
- Natural sunlight: Ideal for those with a sunny south-facing window.
- Grow lights: If natural light is limited, LED grow lights simulate the full spectrum of sunlight and can extend your growing season.
2.5 Watering Supplies
Watering tools may vary based on your setup, but consider:
- Spray bottles: Great for misting without over-saturating the soil.
- Watering cans: A gentle stream can be effective for larger containers.
3. Step-by-Step Growing Guide
3.1 Germinating Seeds
- Prepare Containers: Add your chosen growing medium to the selected container, leaving about half an inch of space from the top.
- Sow Seeds: Evenly distribute seeds over the surface of the soil, avoiding overcrowding. A light, gentle press will help ensure good seed-to-soil contact.
- Watering: Mist the seeds lightly with water to moisten the soil without displacing the seeds. Cover the container with a lid or plastic wrap to maintain humidity and warmth.
- Germination Phase: Place the container in a warm area (around 65°F to 75°F) to encourage germination. Most microgreens will sprout within 3 to 7 days.
3.2 Providing Light
Once germination occurs, remove the cover and expose the microgreens to light:
- If using natural sunlight, position the trays in a bright spot with at least 12-16 hours of light each day.
- For artificial lights, place the grow lights about 2-4 inches above the plants and maintain a consistent light schedule.
3.3 Watering and Nutrients
- Watering: Keep the growing medium moist but not soggy. Use a spray bottle to mist the seedlings daily.
- Fertilizer: Generally, microgreens do not need additional feeding, but you can use a diluted liquid fertilizer once or twice during the growth period if desired.
3.4 Harvesting
Microgreens are typically ready for harvest in 7 to 21 days, depending on the variety. You can determine when they are ready by:
- Observing the development of the first true leaves.
- Noting the height: most microgreens should be around 2-3 inches tall.
- Using clean scissors, cut the greens just above the soil line. Rinse them gently and dry before use.
4. Indoor Gardening Environment
Maintaining the right environment is crucial for the success of your indoor garden.
4.1 Temperature and Humidity
- Temperature: Aim for a consistent range of 65°F to 75°F for optimal growth.
- Humidity: Microgreens thrive in humid environments. If your indoor air is dry, especially in winter, consider using a humidity tray or applying a mist of water occasionally.
4.2 Air Circulation
Good air circulation helps prevent mold and pests. A small fan can aid airflow, especially in a closed space.
5. Seasonal Considerations
Although you can grow microgreens year-round, recognizing seasonal influences can inform your planting choices:
5.1 Winter
- Light Needs: Days are shorter, so use grow lights to provide adequate lighting.
- Varieties: Choose hardier greens like kale and mustard, which perform well in cooler temperatures.
5.2 Spring
- Varieties: Experiment with herbs and lettuces that grow rapidly during this season.
- Ventilation: With warmer weather, ensure there’s sufficient airflow to avoid overheating your plants.
5.3 Summer
- Cooling Methods: Avoid heat stress; place trays in cooler spots and consider using fans.
- Varieties: Sunflower and pea shoots are great for summer as they grow quickly and produce high yields.
5.4 Fall
- Planning For Growth: As days shorten, shift back to using artificial lighting.
- Varieties: Opt for nutritious greens like arugula and beetroot microgreens.
6. Troubleshooting Common Issues
Even with meticulous care, you may encounter challenges when growing microgreens. Here are some common problems and solutions:
6.1 Mold
- Cause: Excess moisture and poor airflow can lead to mold growth.
- Solution: Ensure good drainage, avoid overwatering, and enhance air circulation.
6.2 Wilting or Yellowing Leaves
- Cause: This could indicate overwatering or a lack of nutrients.
- Solution: Adjust your watering routine and consider a diluted fertilizer if needed.
6.3 Pests
- Cause: Indoor pests like aphids can be a nuisance.
- Solution: Inspect your plants regularly and use insecticidal soap or neem oil if necessary.
7. Expanding Your Indoor Garden
Once you master growing microgreens, you can expand your indoor garden. Consider:
- Herbs: Basil, cilantro, and parsley can be grown easily indoors.
- Vegetables: Small veggies like radishes and dwarf varieties of peppers can thrive indoors with proper sunlight.
- Progression: You can stagger your planting cycles to ensure a continuous harvest throughout the year.
Conclusion
Growing microgreens indoors year-round is not only feasible but also rewarding. With the right supplies, techniques, and environmental conditions, you can enjoy fresh, nutritious greens regardless of the season. Experimenting with different varieties, maintaining proper care, and staying vigilant against potential issues will enable you to create a thriving indoor garden. Begin your journey today and savor the benefits of fresh microgreens!